
How to Create a Layered Starbucks Cold Cup Wrap
Have you seen the adorable customized Starbucks cold cup wraps that are taking over the internet? I don’t know about you, but the level of creativity I’m seeing lately is out of this world!
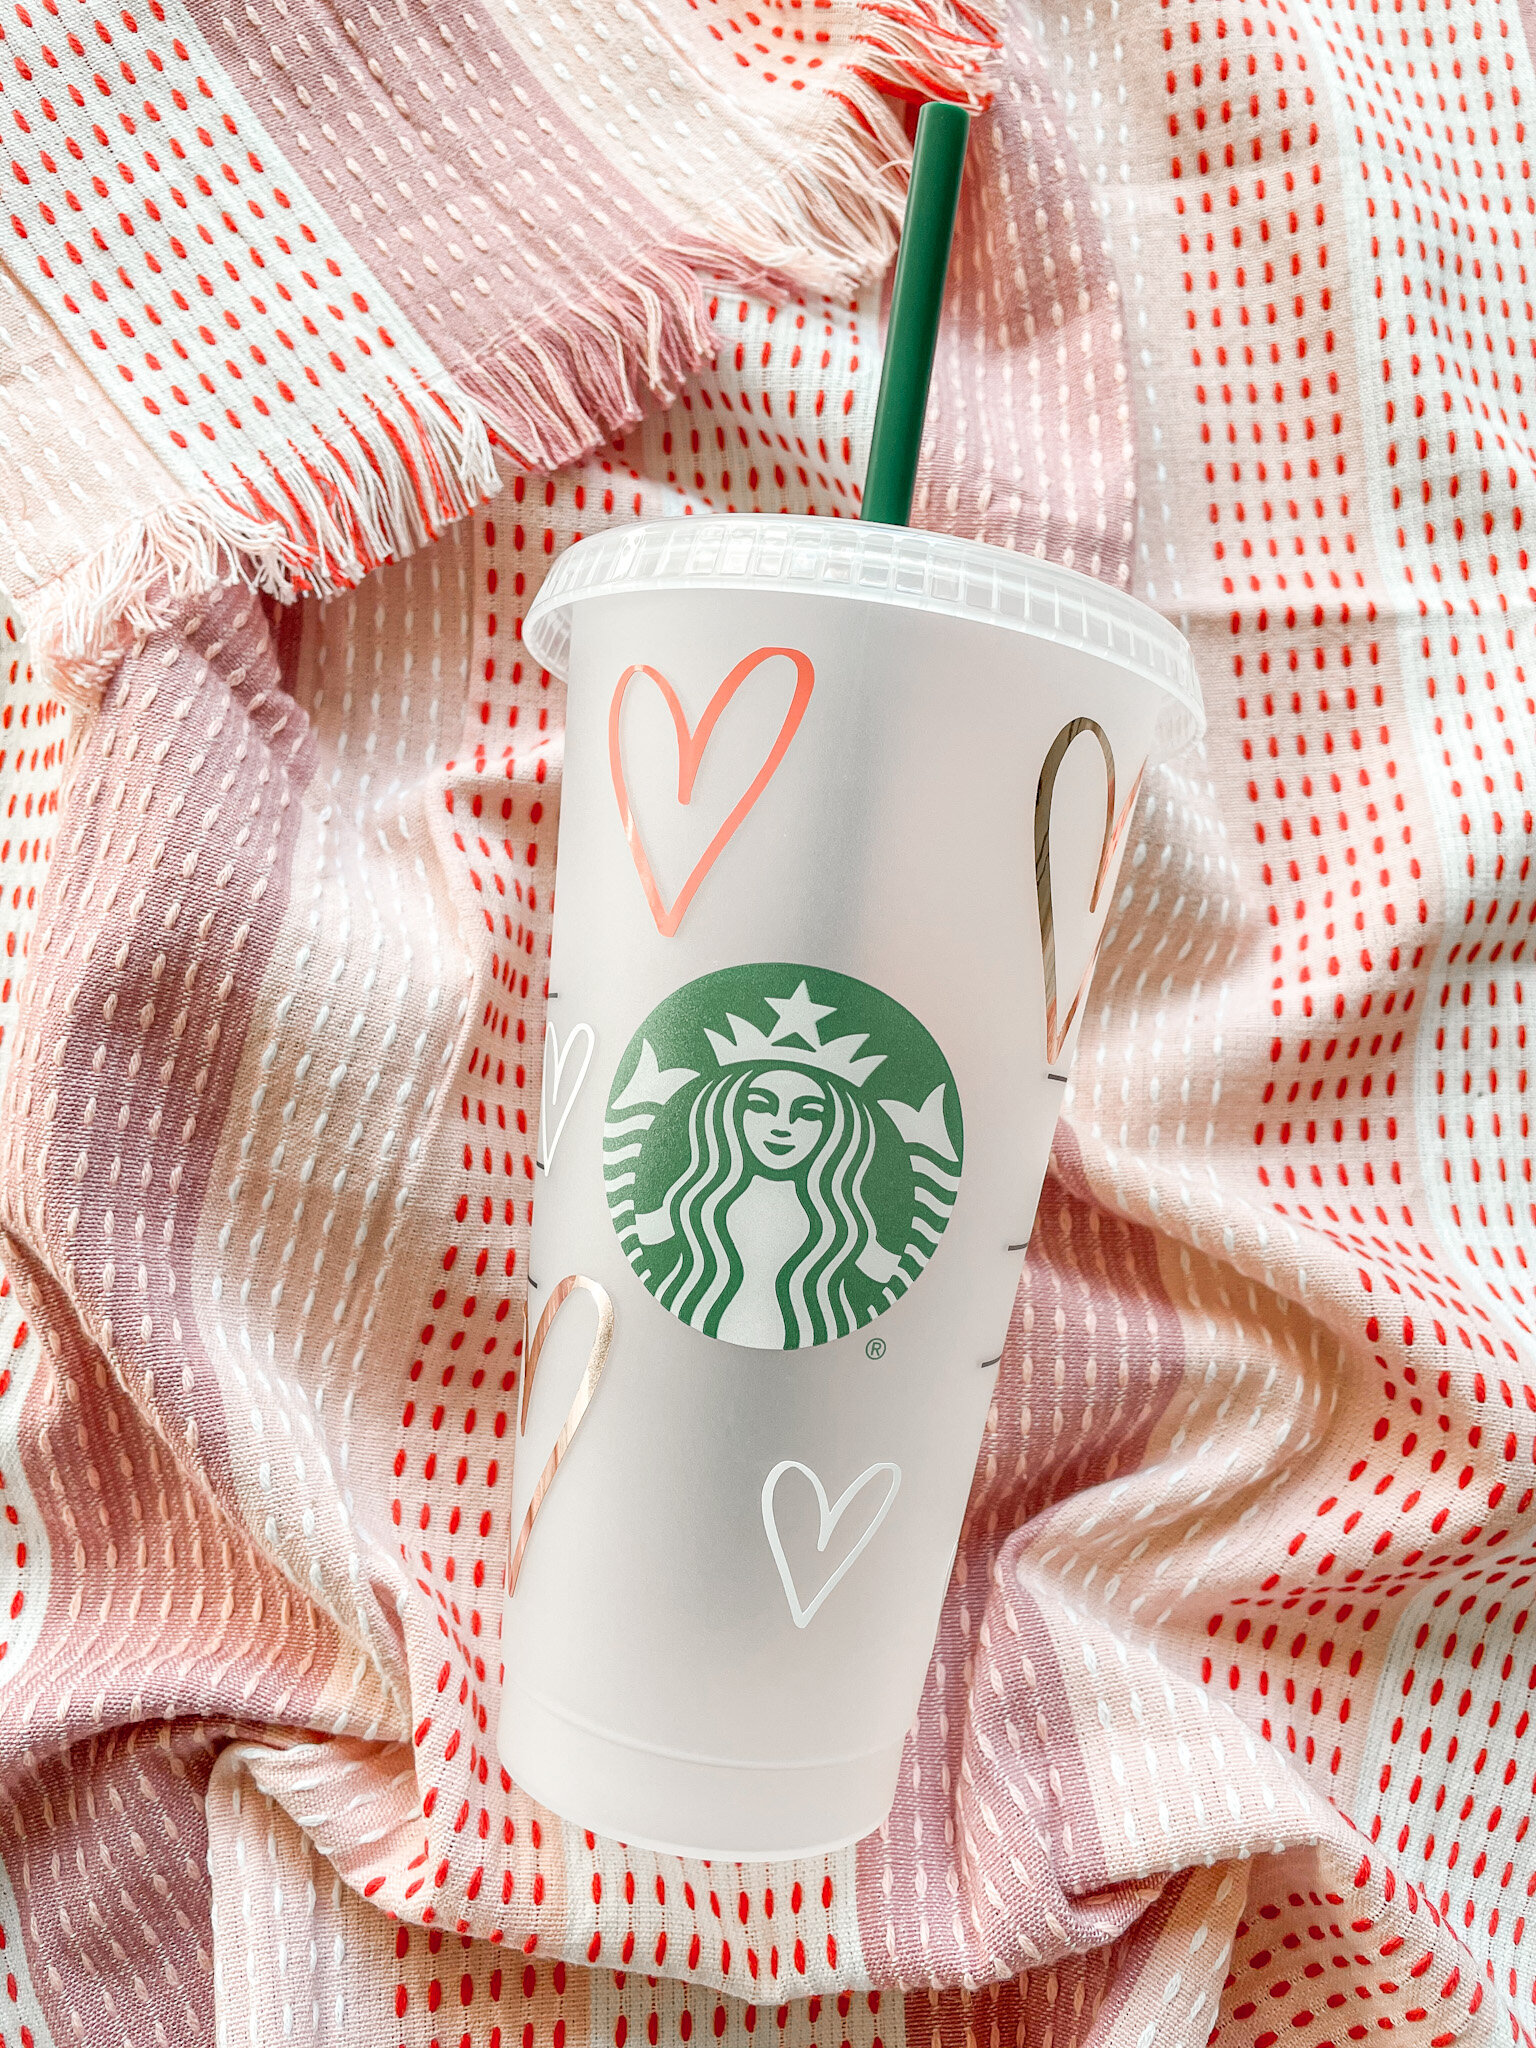
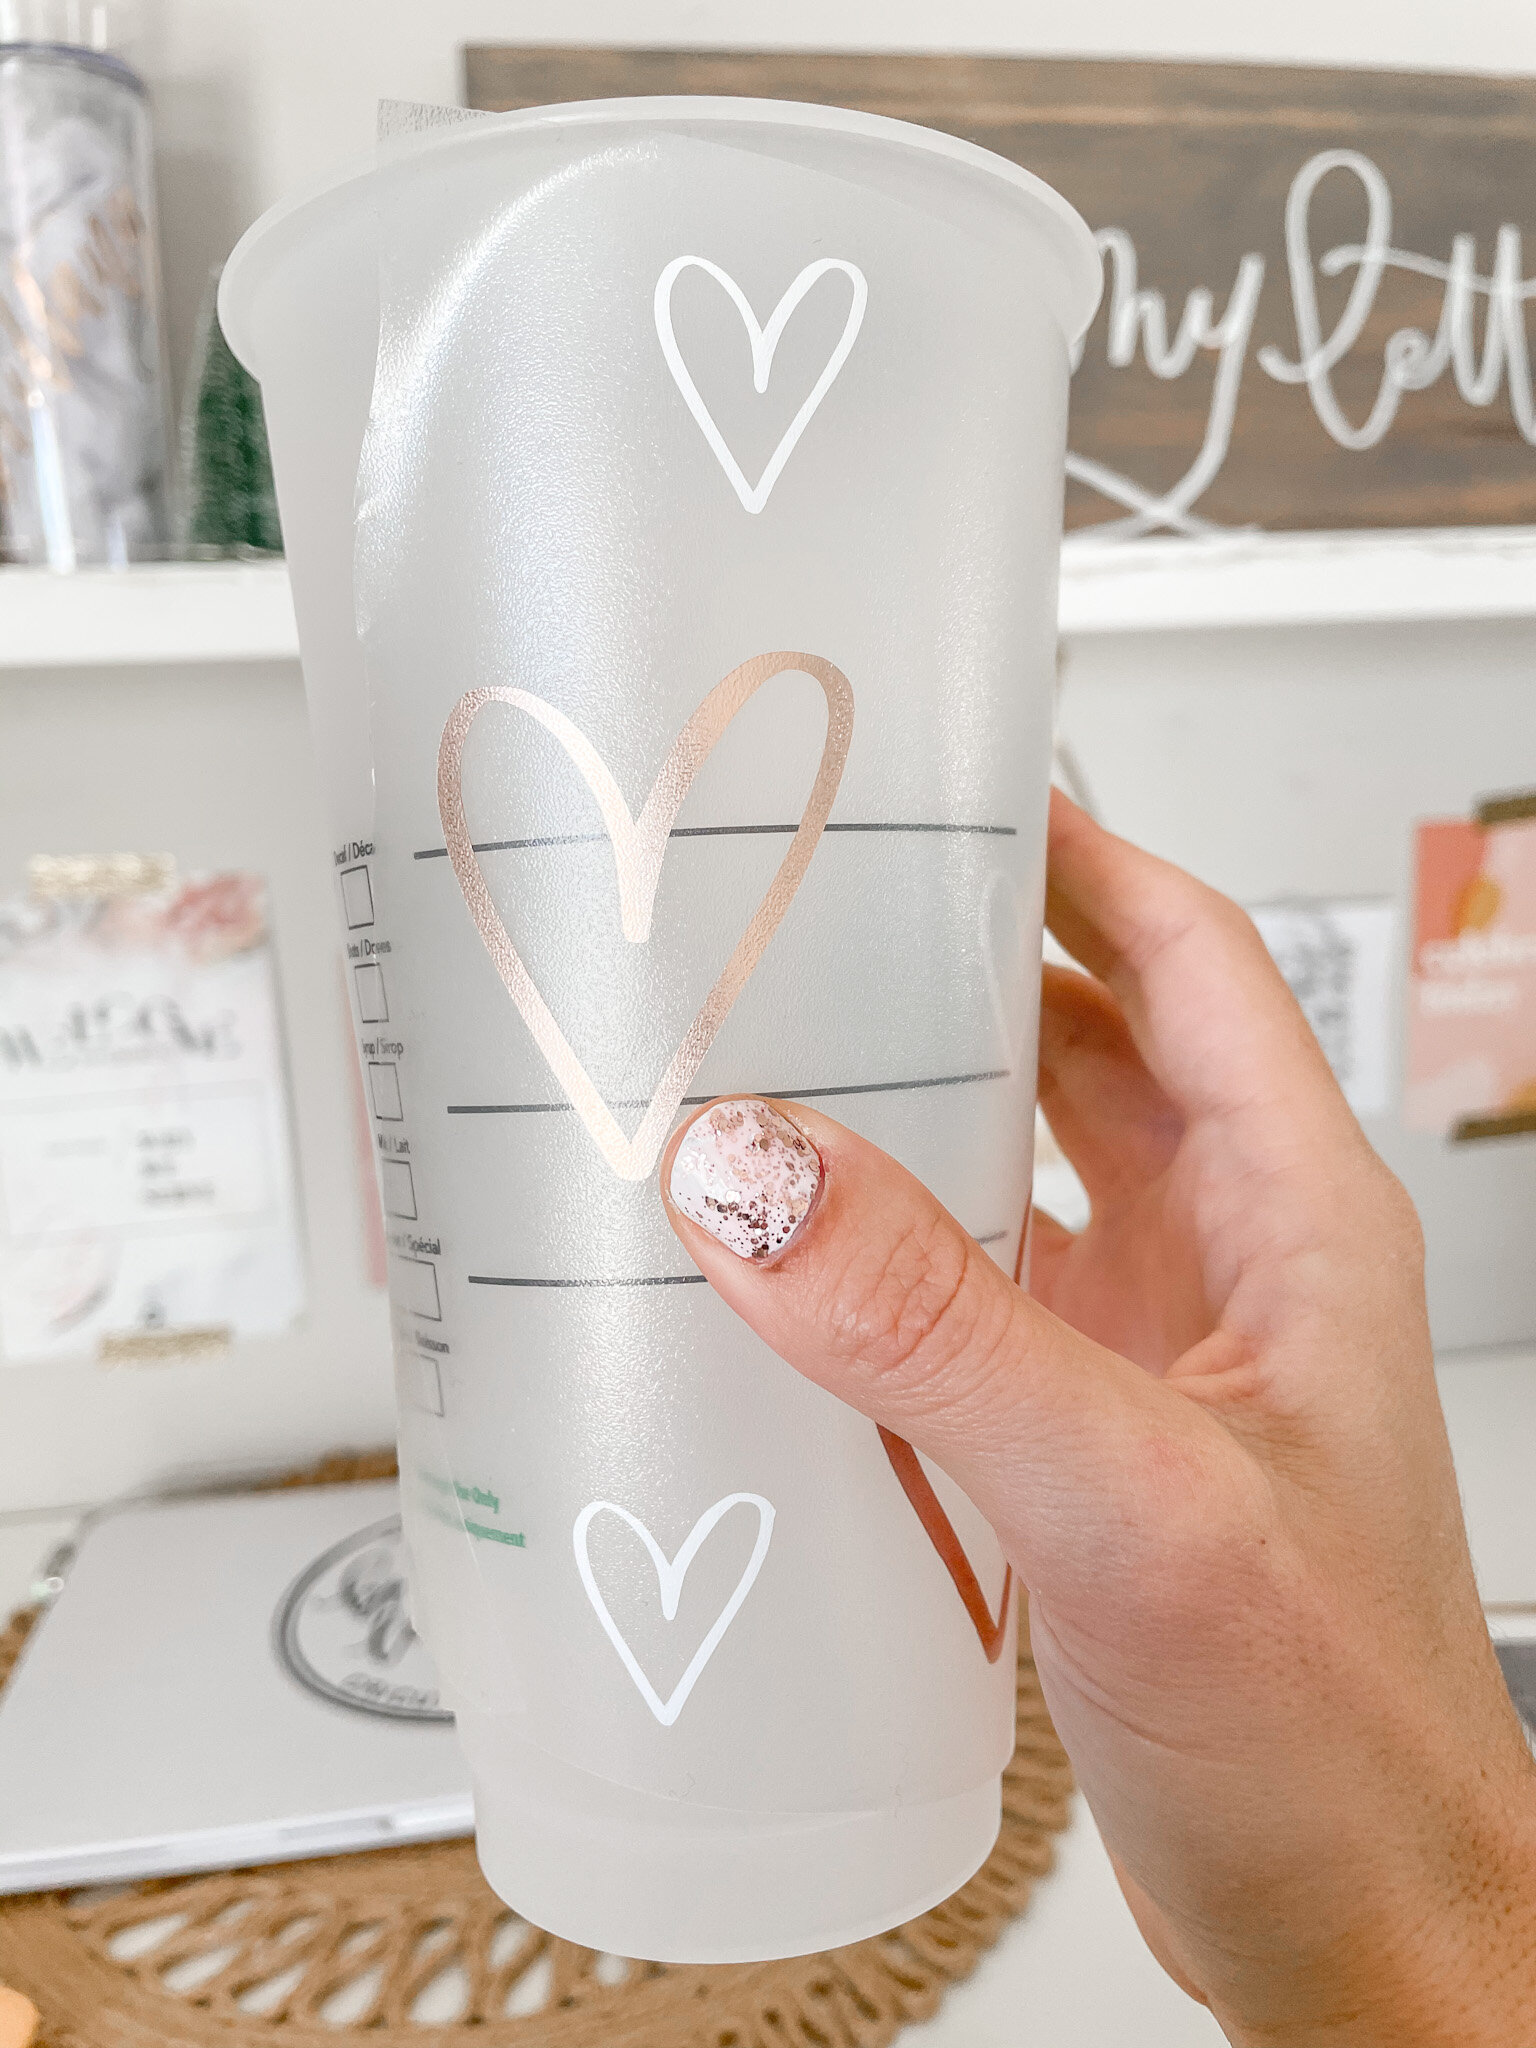
I wanted to create a design that was unique to my style and would also teach you how to make your own as well. I also wanted to try a layered cold cup wrap design with different colors. After a bit of practice I can finally say that it is totally doable! These are so easy and fun to create, and they make the perfect small gift especially for Valentines (or Galentines) Day!
You can customize them a million different ways … but here’s a simple tutorial for how to make this design. I’ll also show you how to create & customize your own!
What You Need:
Starbucks cold cup (you can get them in store at Starbucks or use these on Amazon)
Permanent Adhesive Vinyl (I used this kind from Expressions Vinyl)
Cricut (or similar) craft cutting machine. I have this one.
Basic tool set for weeding & scraping
Hand Drawn Hearts design (available on my Freebies page!)

Step One: Draw & Design (skip this step if you’ve already downloaded my free design above).
Start by opening up your Procreate app on your iPad. Upload the the Starbucks Cold Cup Templates image (grab it on my Freebies page!) to a new Canvas. I like to fill it in a fun color so that you can do your lettering in black on top. Add a new layer above & begin drawing any design you'd like. I chose to draw simple hearts!
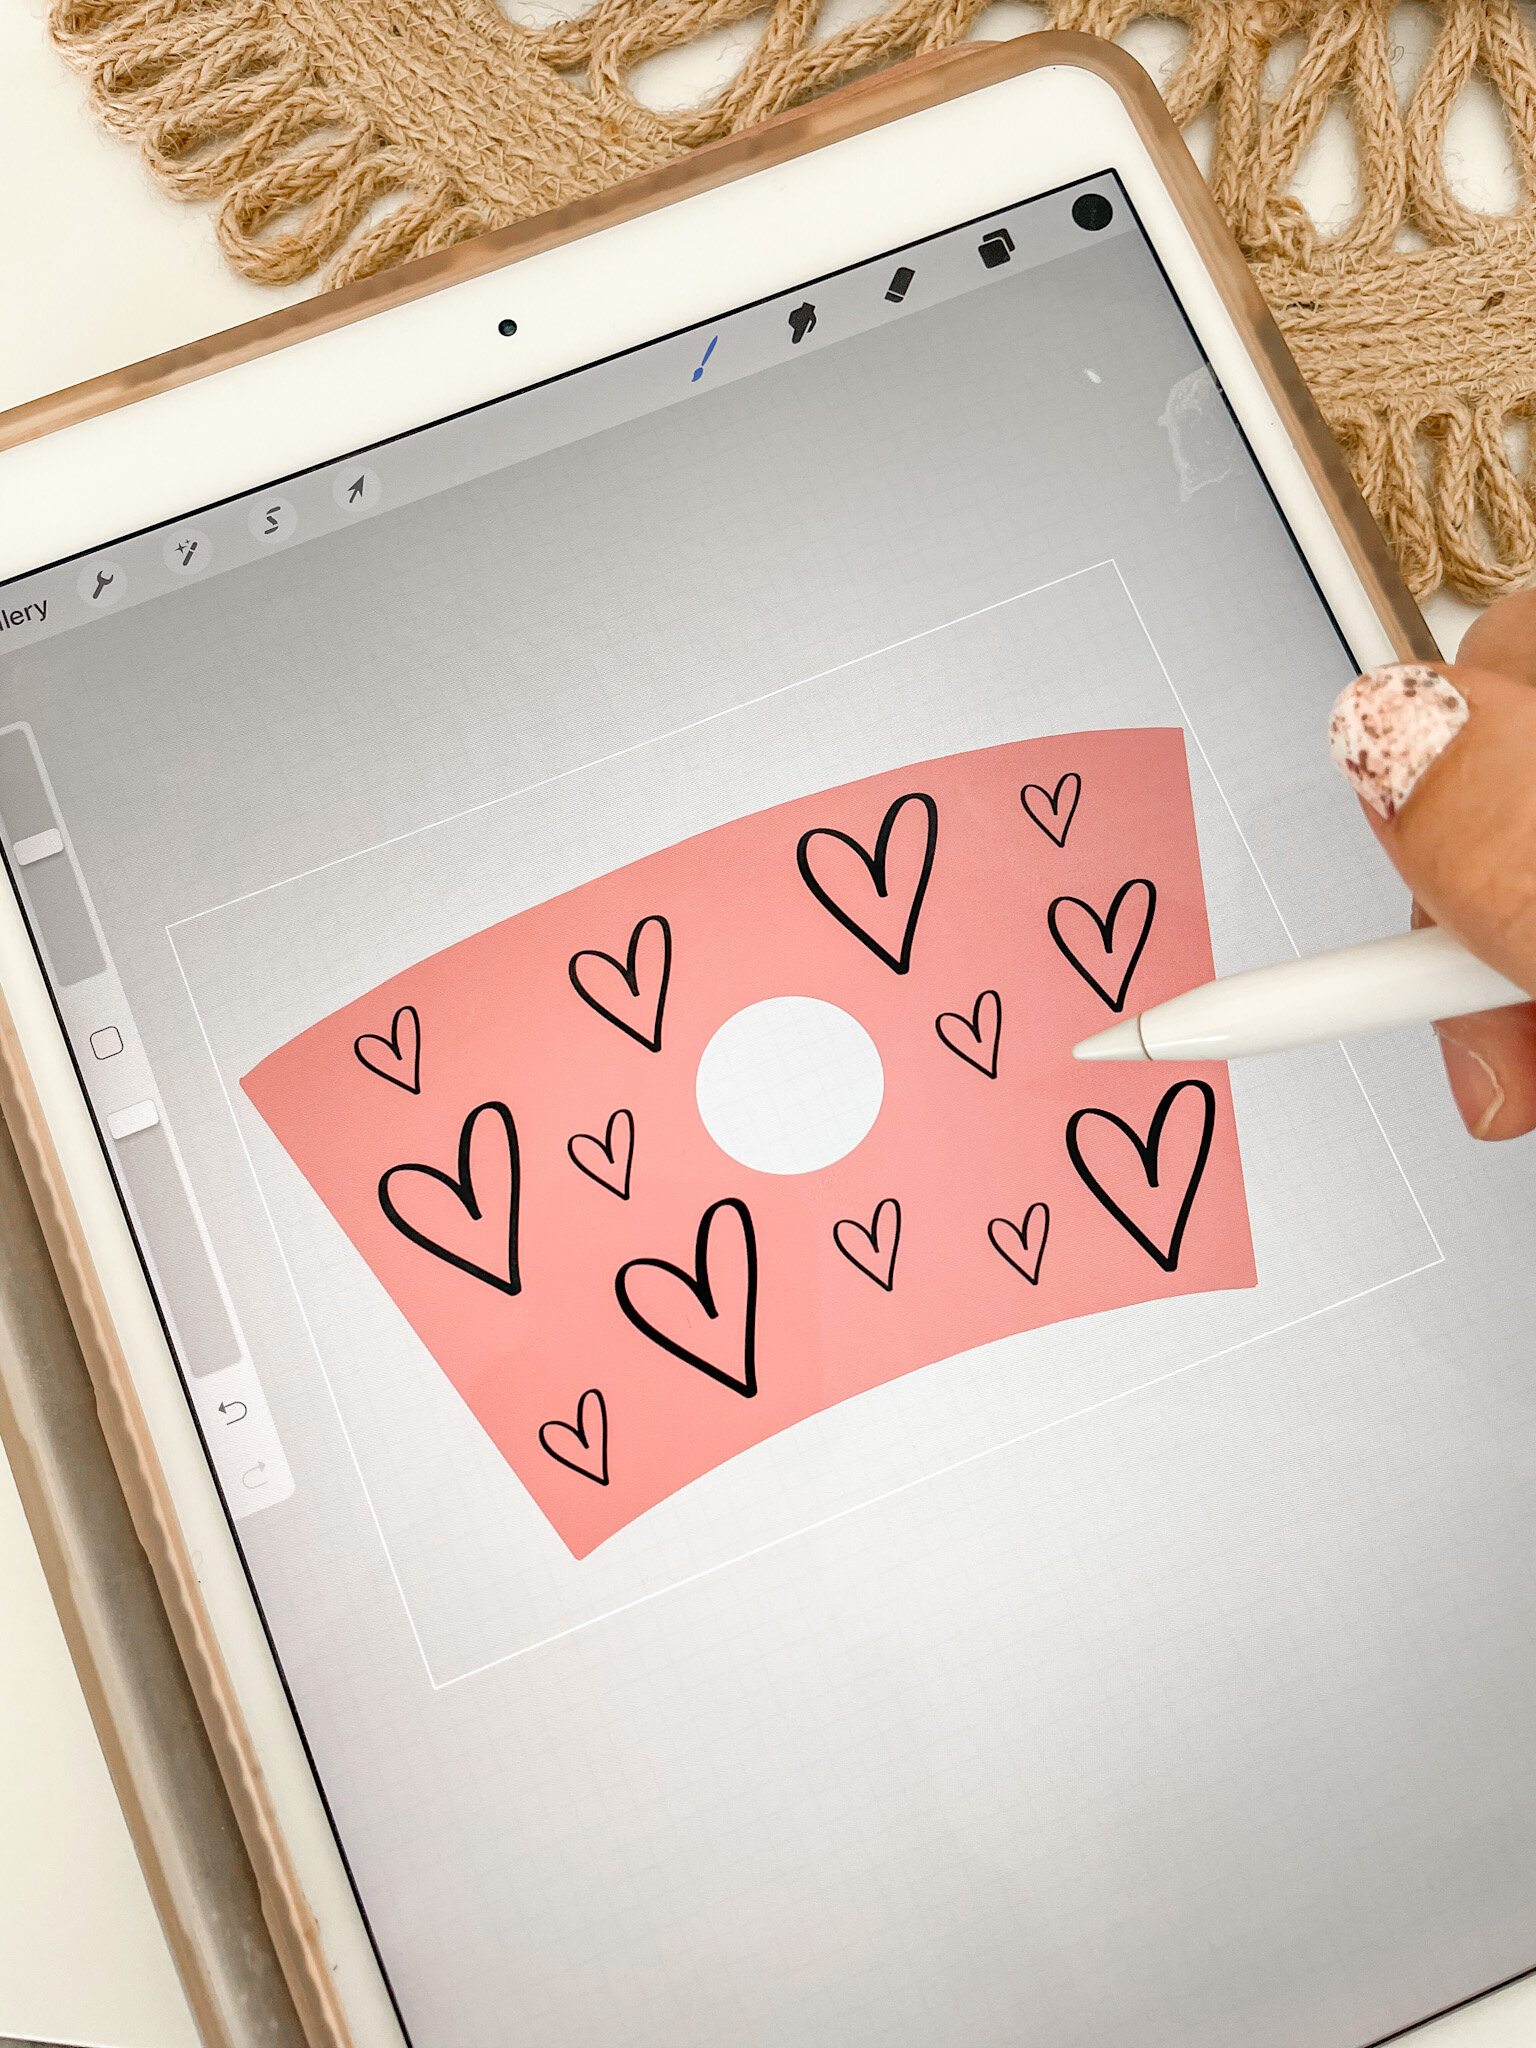
Once you’re happy with your design, unselect the template layer below so that you’re only left with the drawing or lettering you created. Be sure to also unselect the bottom “background” layer so that it is a transparent image.
Next, select the tool icon at the top left to export the drawing as a transparent PNG to your computer.
Step Two: Edit in Design Space
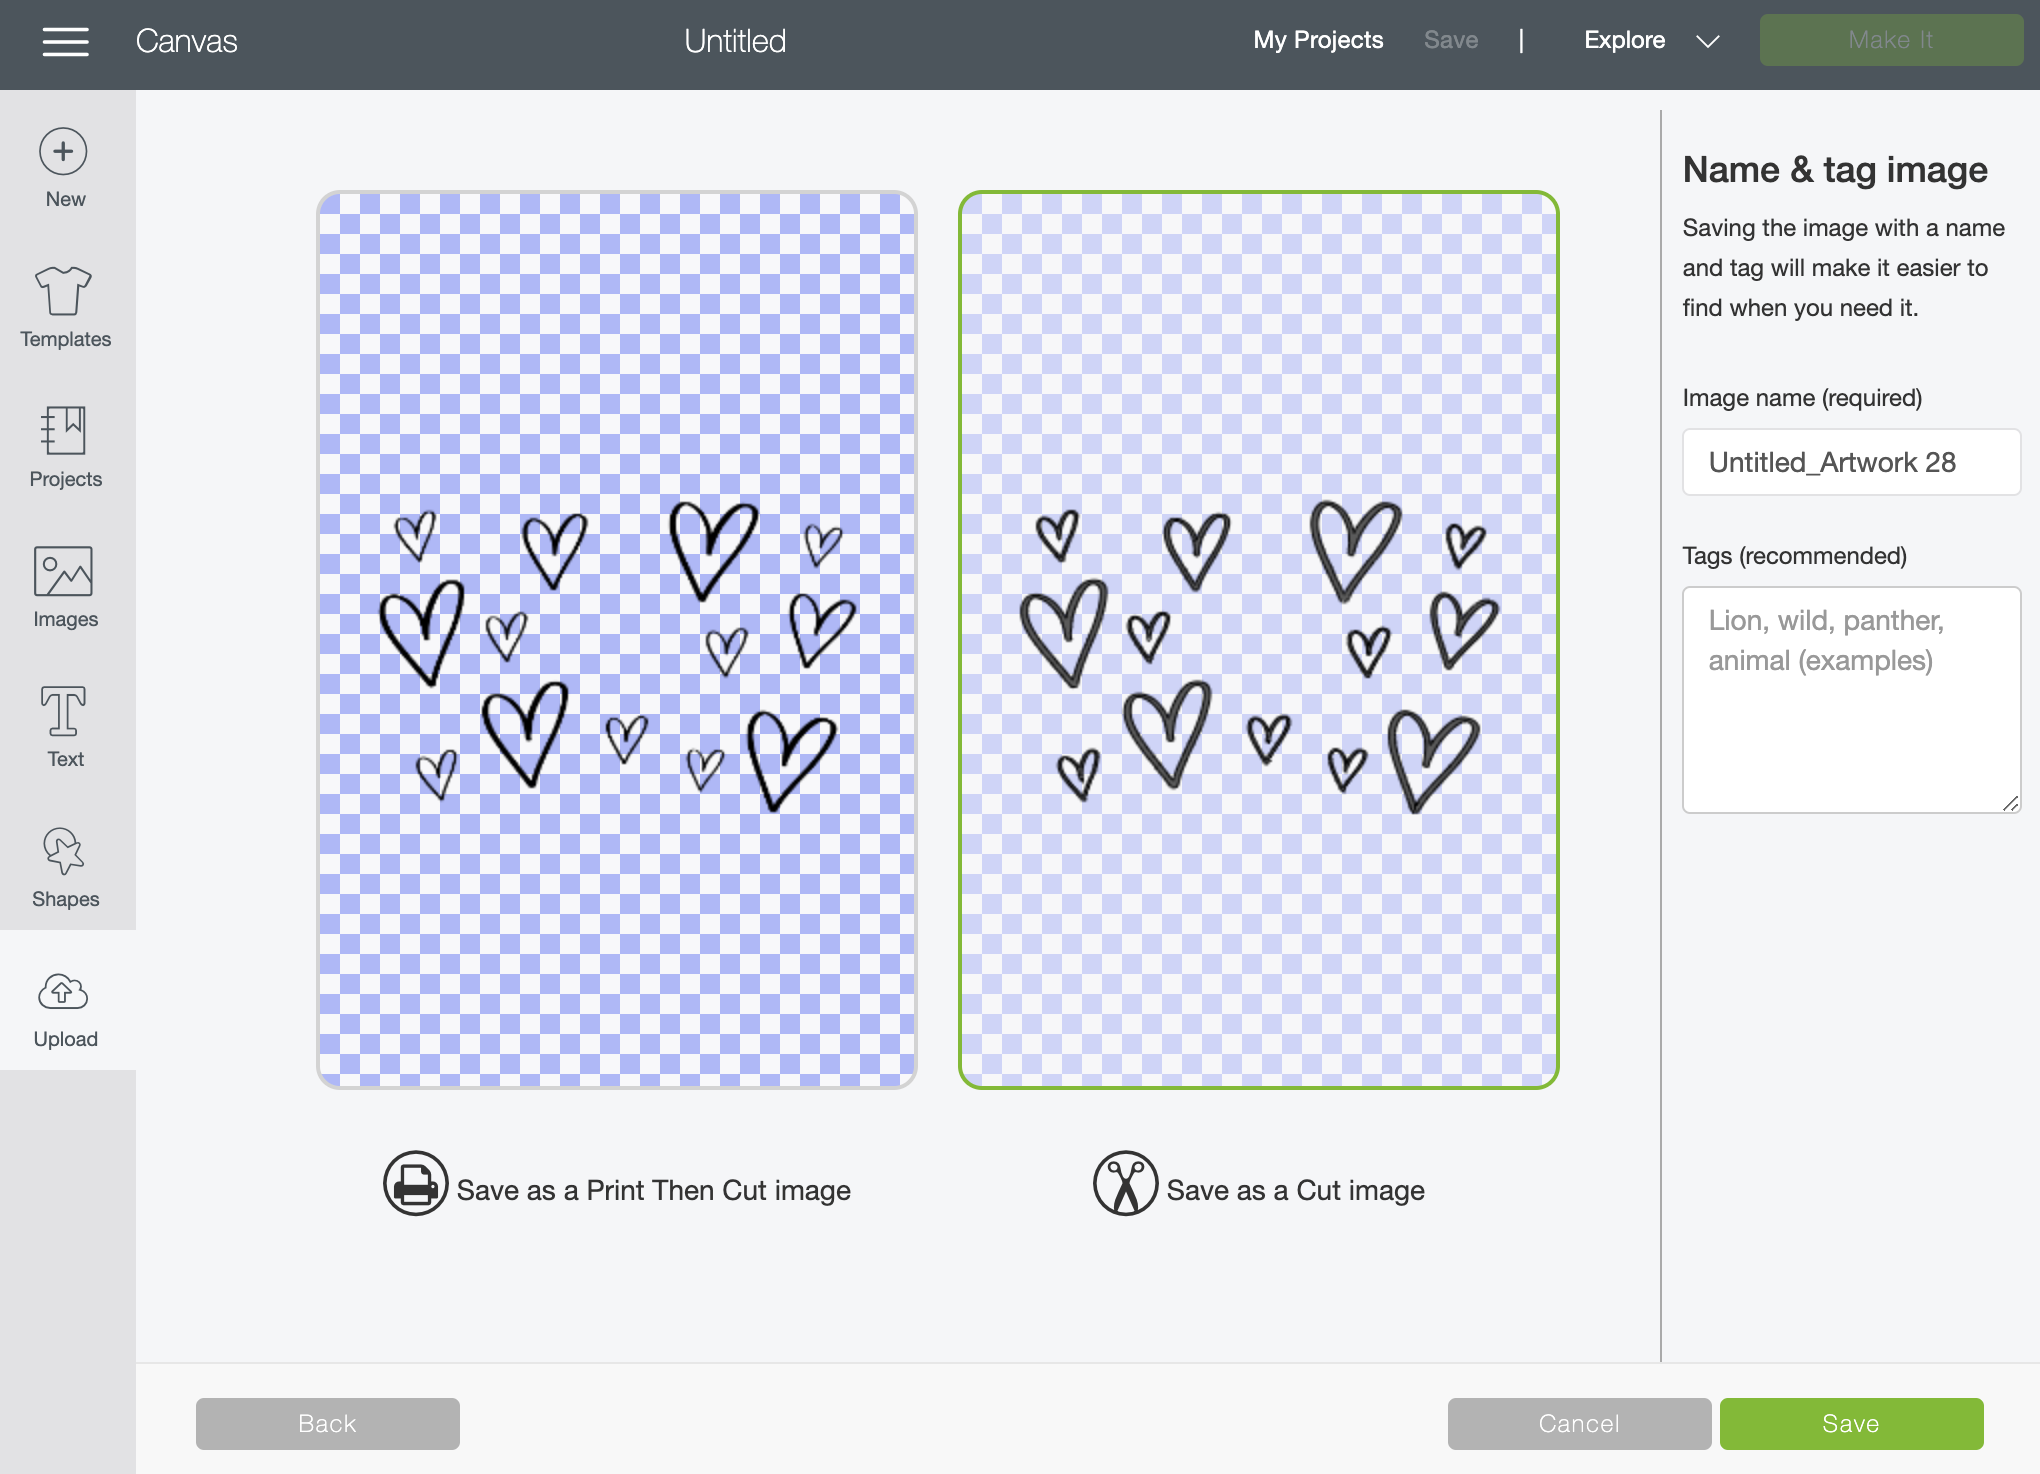
Once you’ve got the PNG on your computer, open your Cricut Design Space software and upload the png. Once you upload, select “simple” image & Continue.
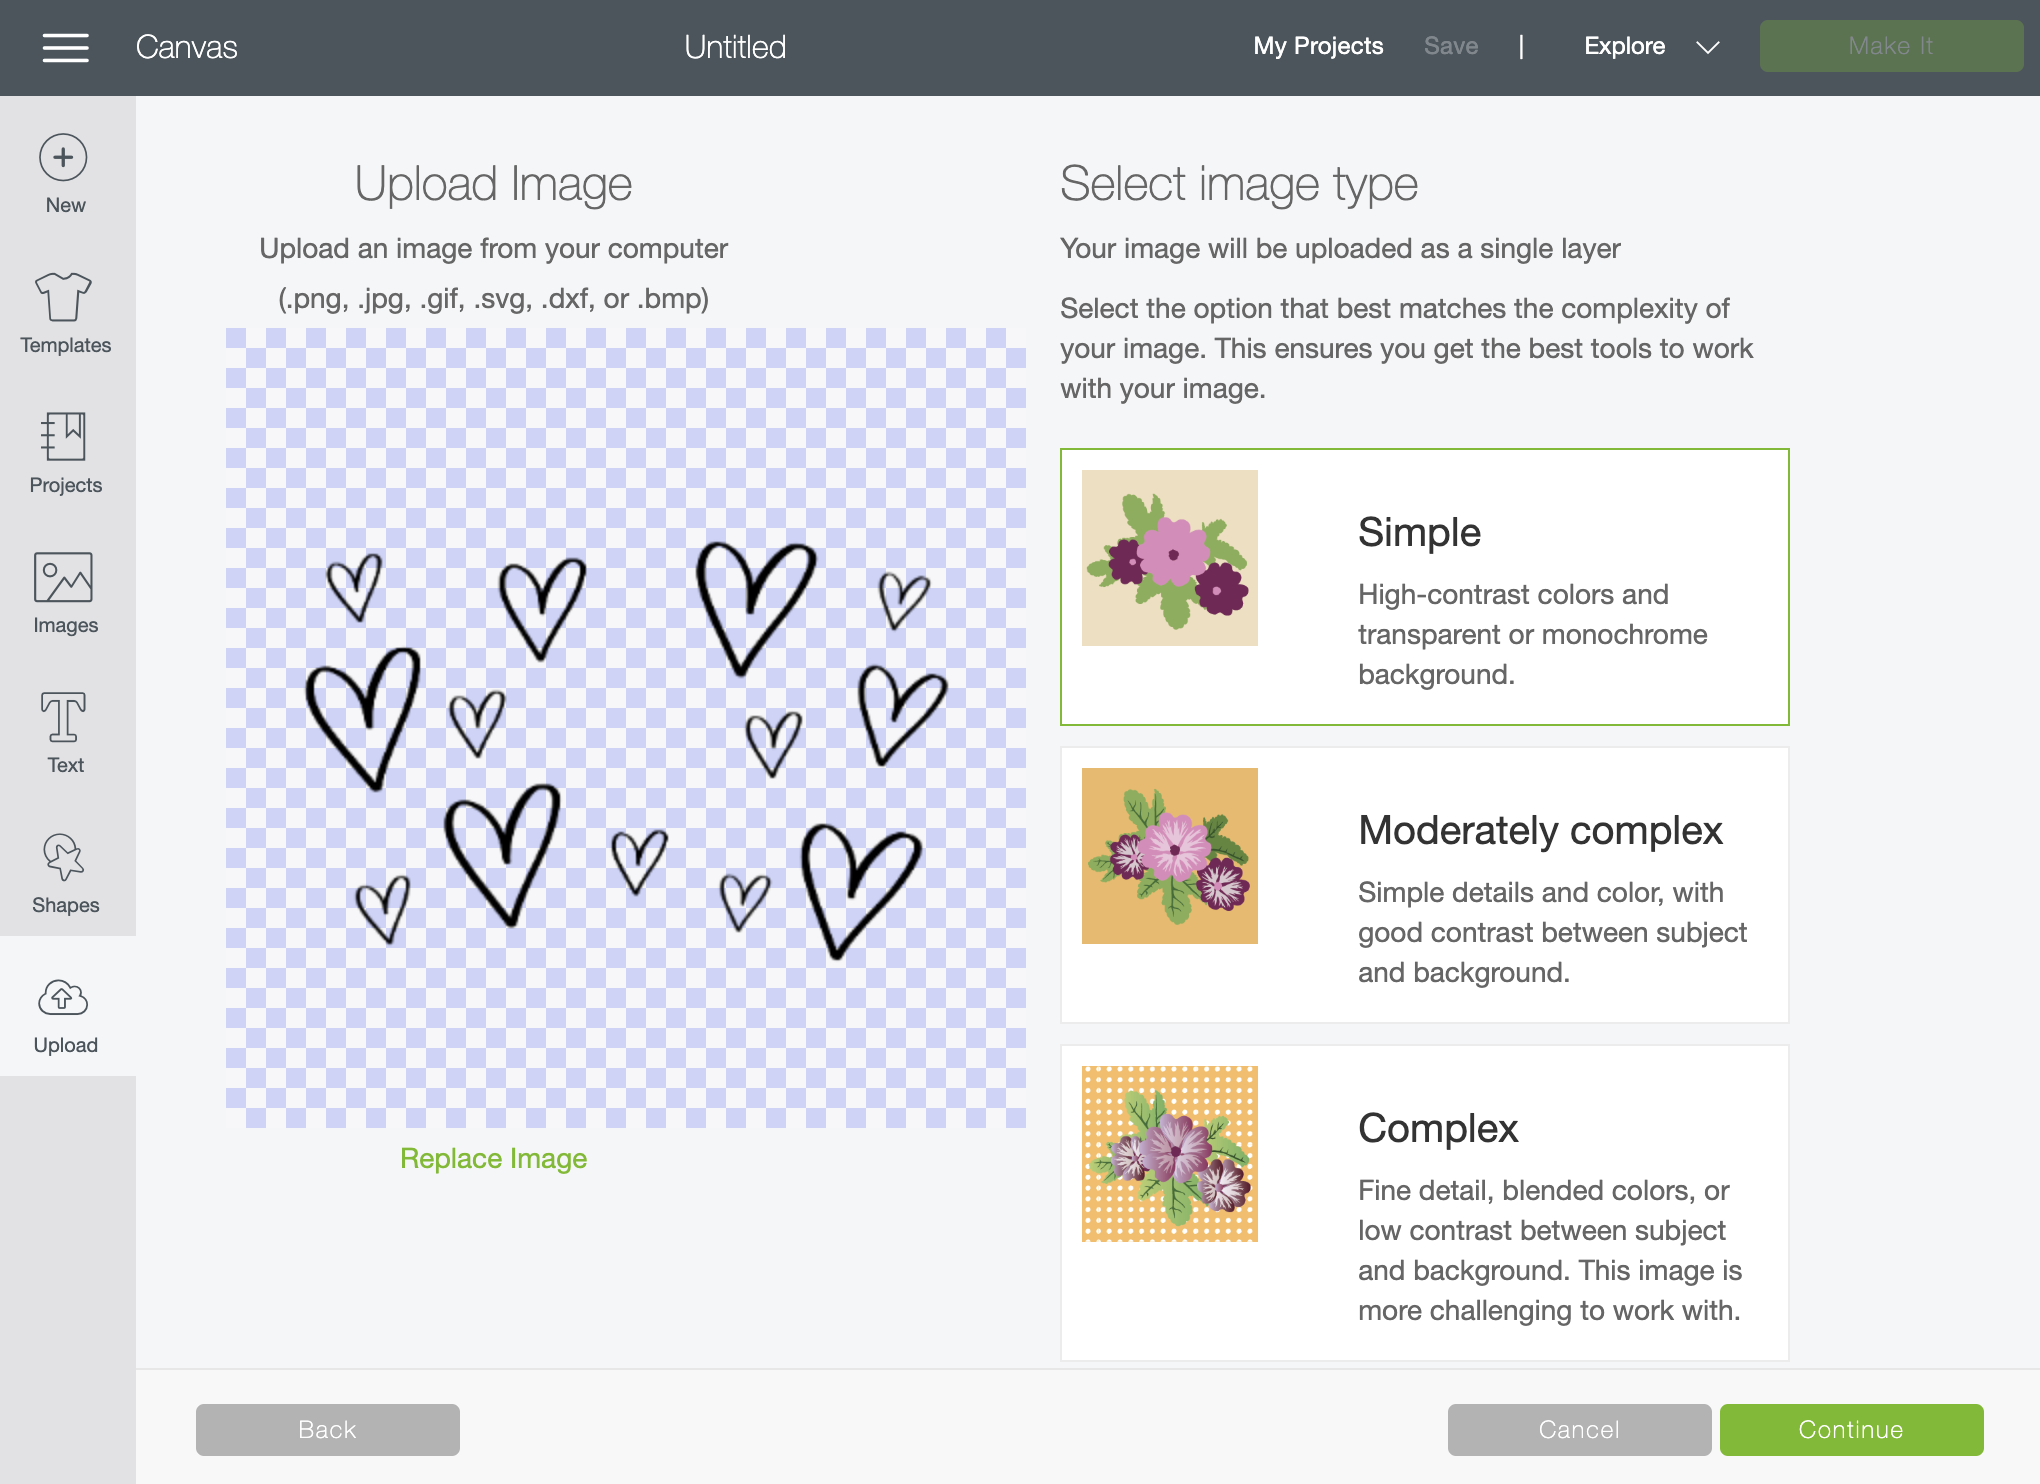
The next page allows you to select and delete the background. You can skip this step, since your design is already transparent. Click continue.
The next page prompts you to save as a Print then Cut or regular Cut image. Select “Save as Cut image” and Continue.
The next few steps you can do a few different ways. I’m going to show you the way that worked for me, but feel free to do this however you’d like.
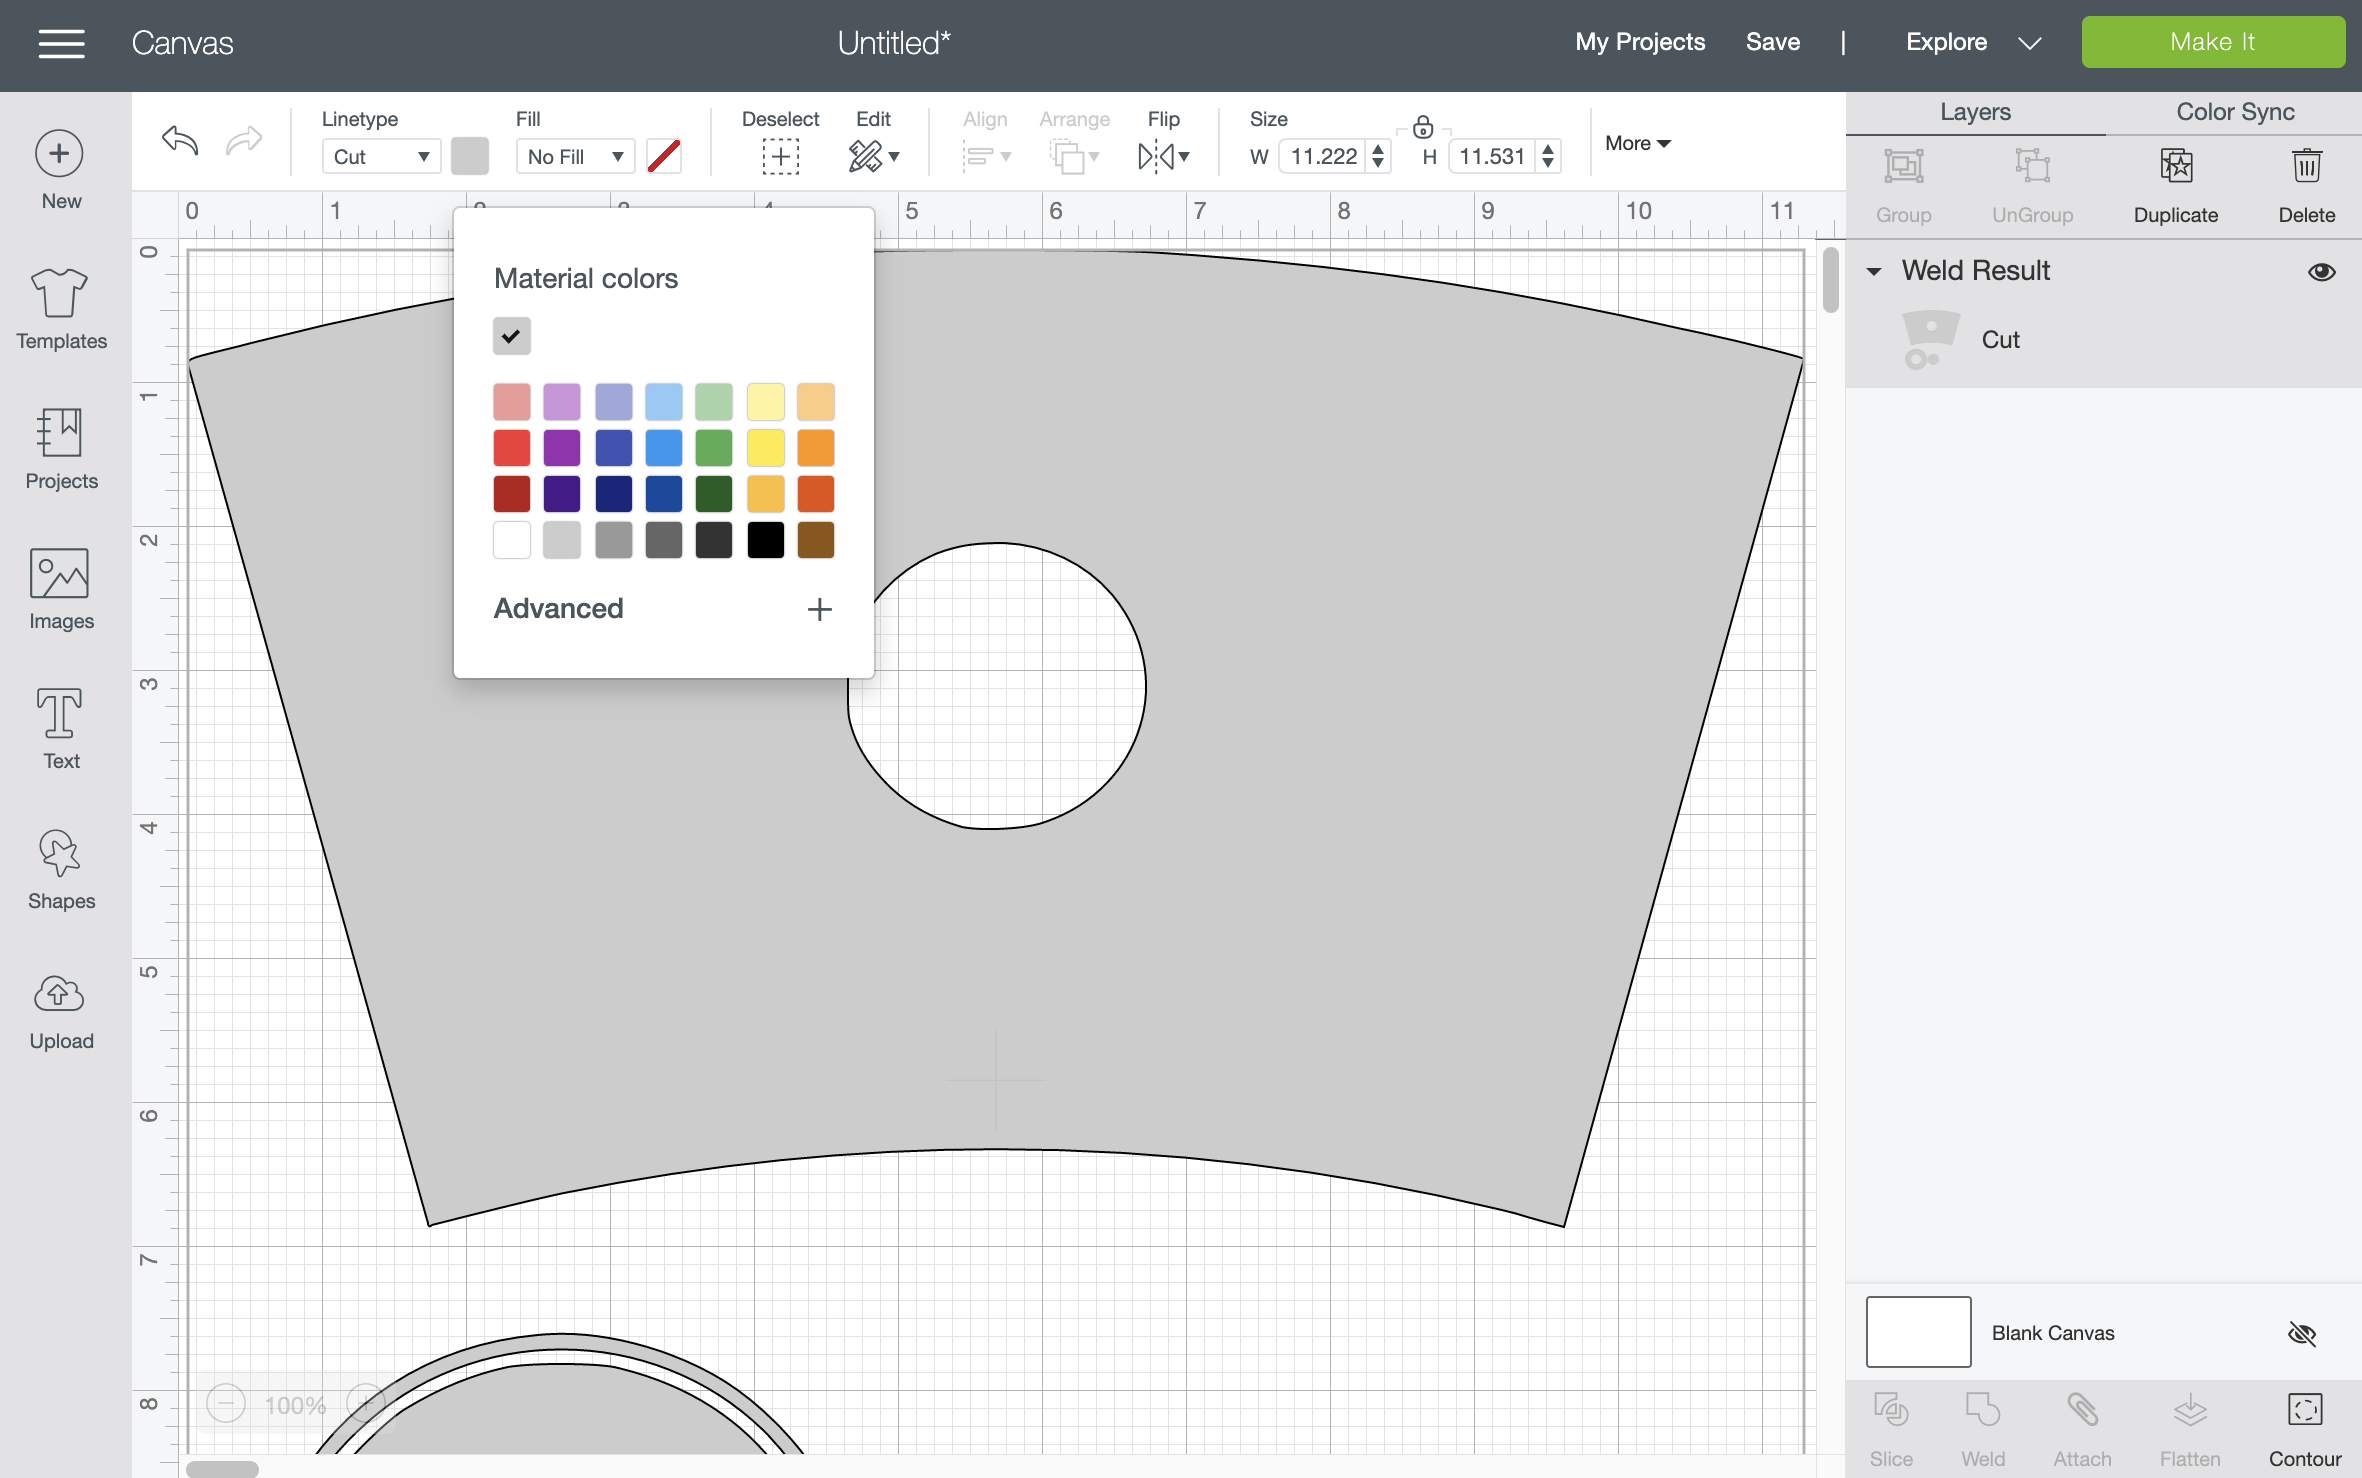
The cold-cup wrap template is scaled to the correct size, but I didn’t take the time to size the quick little hearts design I drew above. Since I know this, I will want to upload the wrap template on my Design Space canvas just to use as a background for sizing.
This is essentially the same thing I just did on the iPad when I was creating the design in the beginning. I will upload my hearts on top and size them to fit.
Once your template is loaded, I like to change the background color so that you can clearly see the hearts on top.
Click the Upload icon at the bottom left and now you can add your hearts design to the Canvas. You’ll see that when it’s first loaded, it’s way too big.
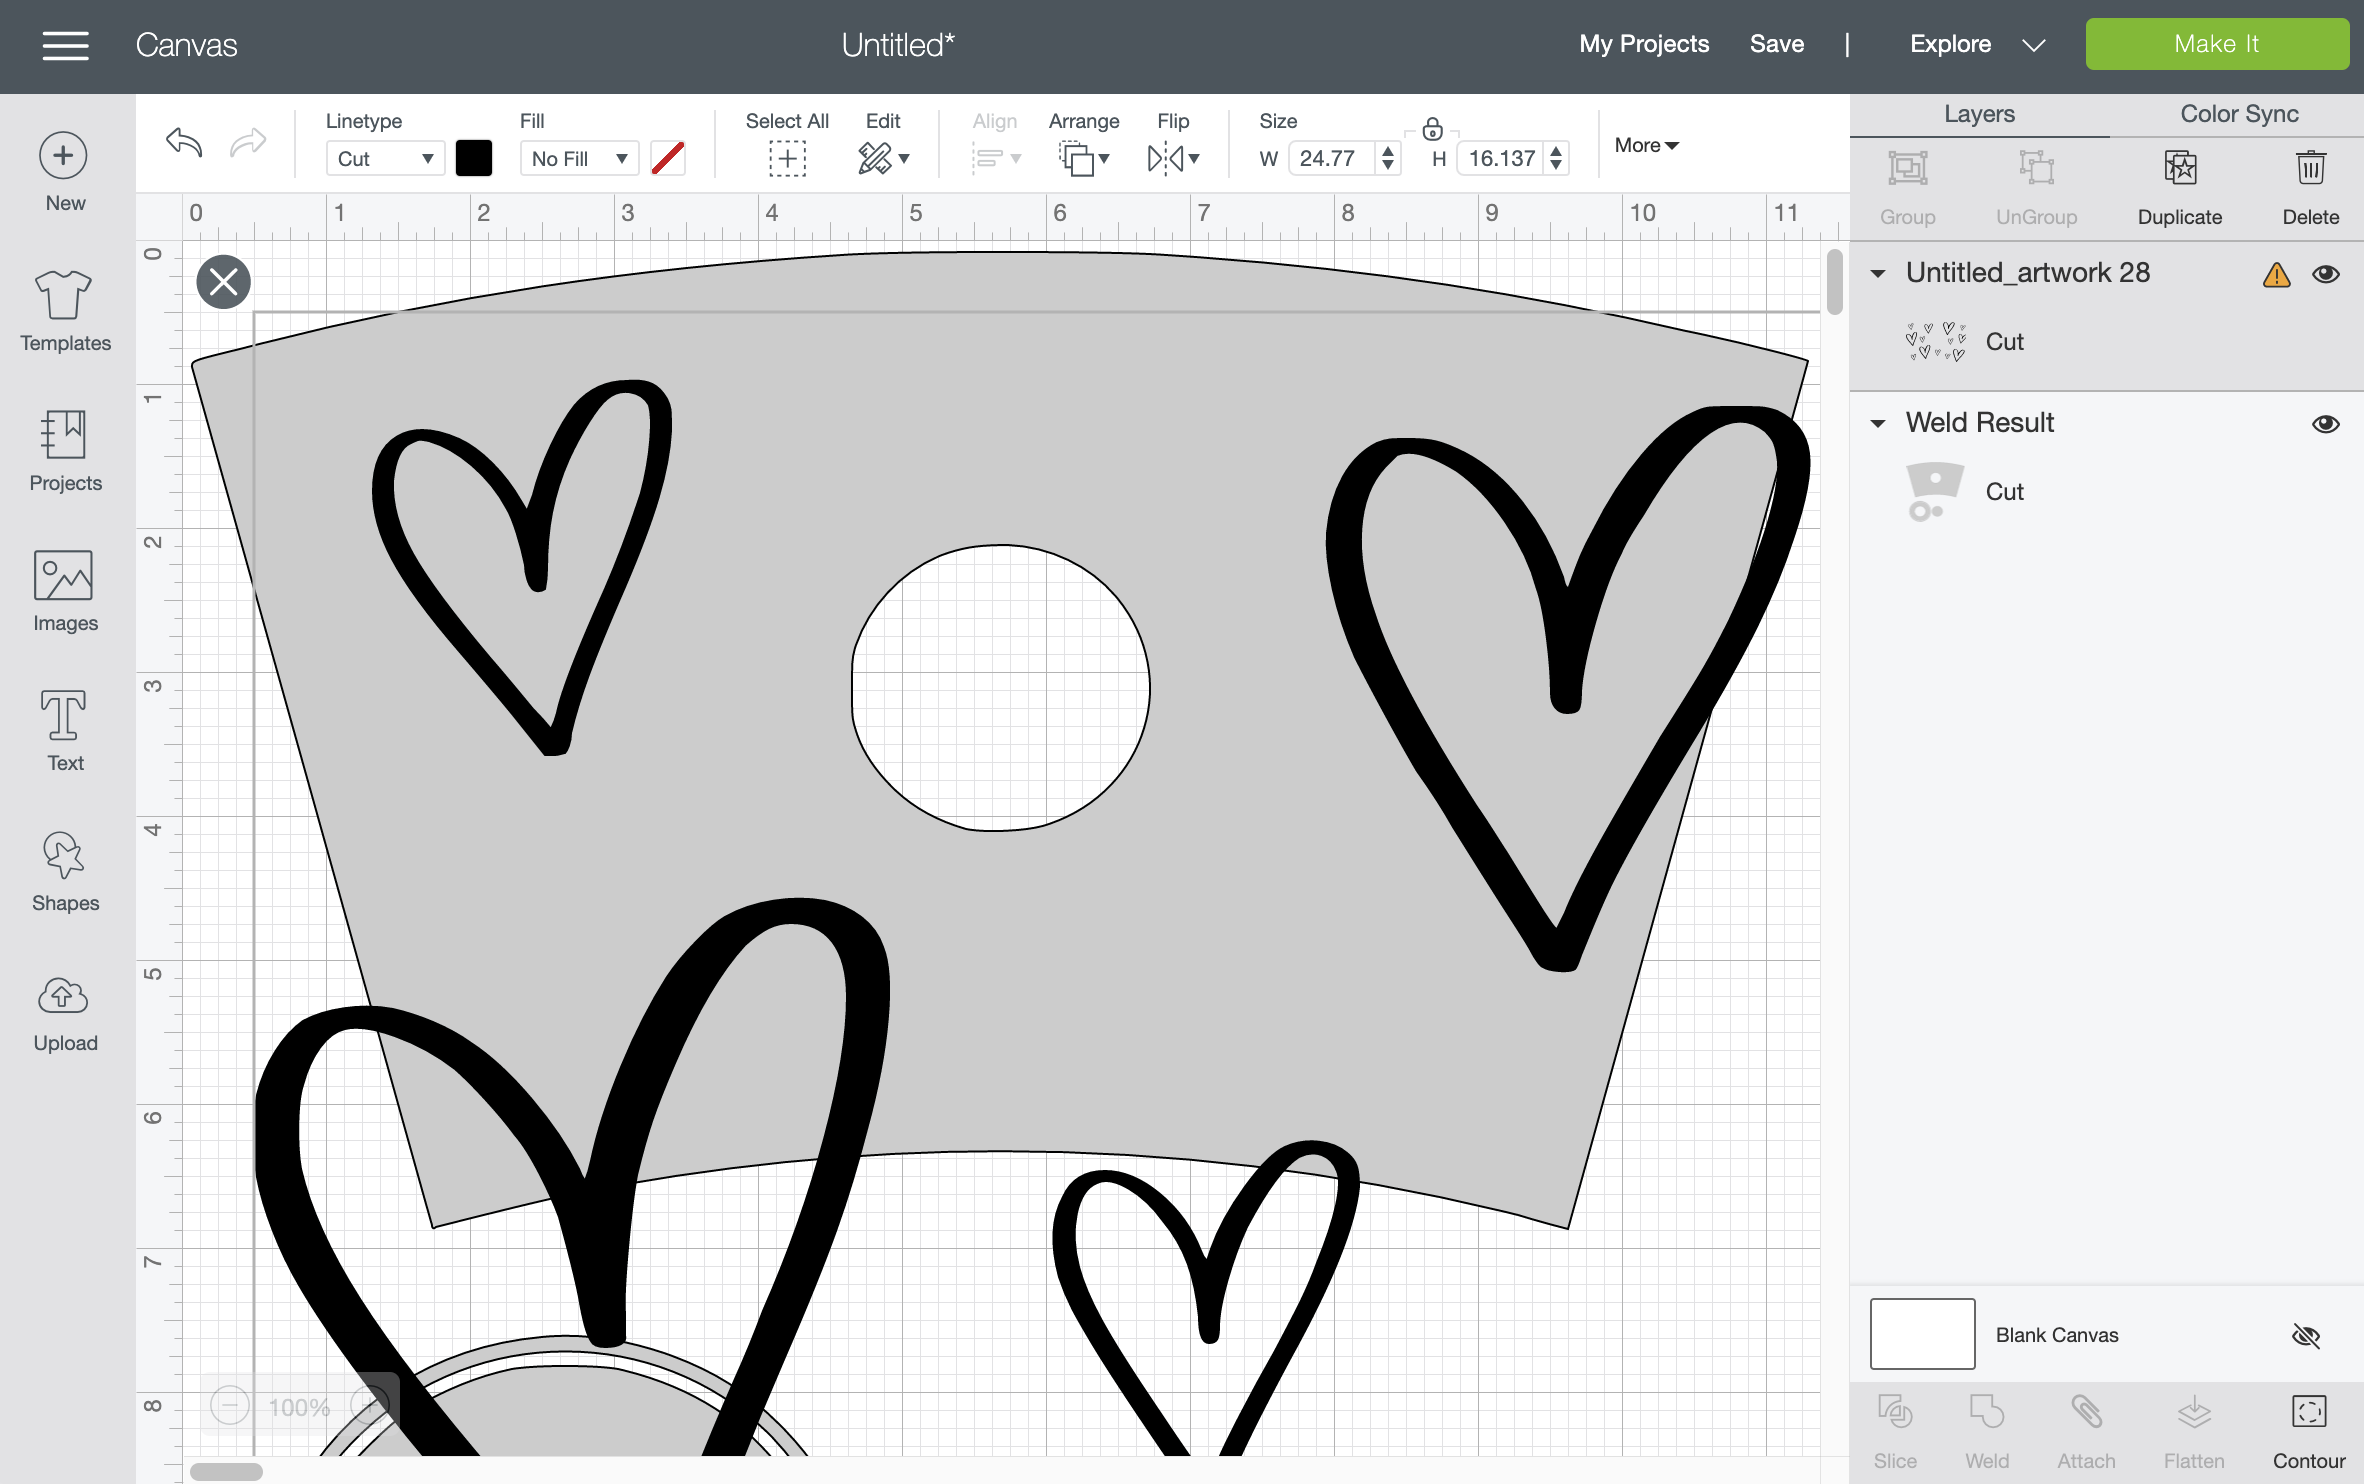
Drag and shrink the size of your hearts design to fit on top of your cold cup template.


Now its a perfect fit!
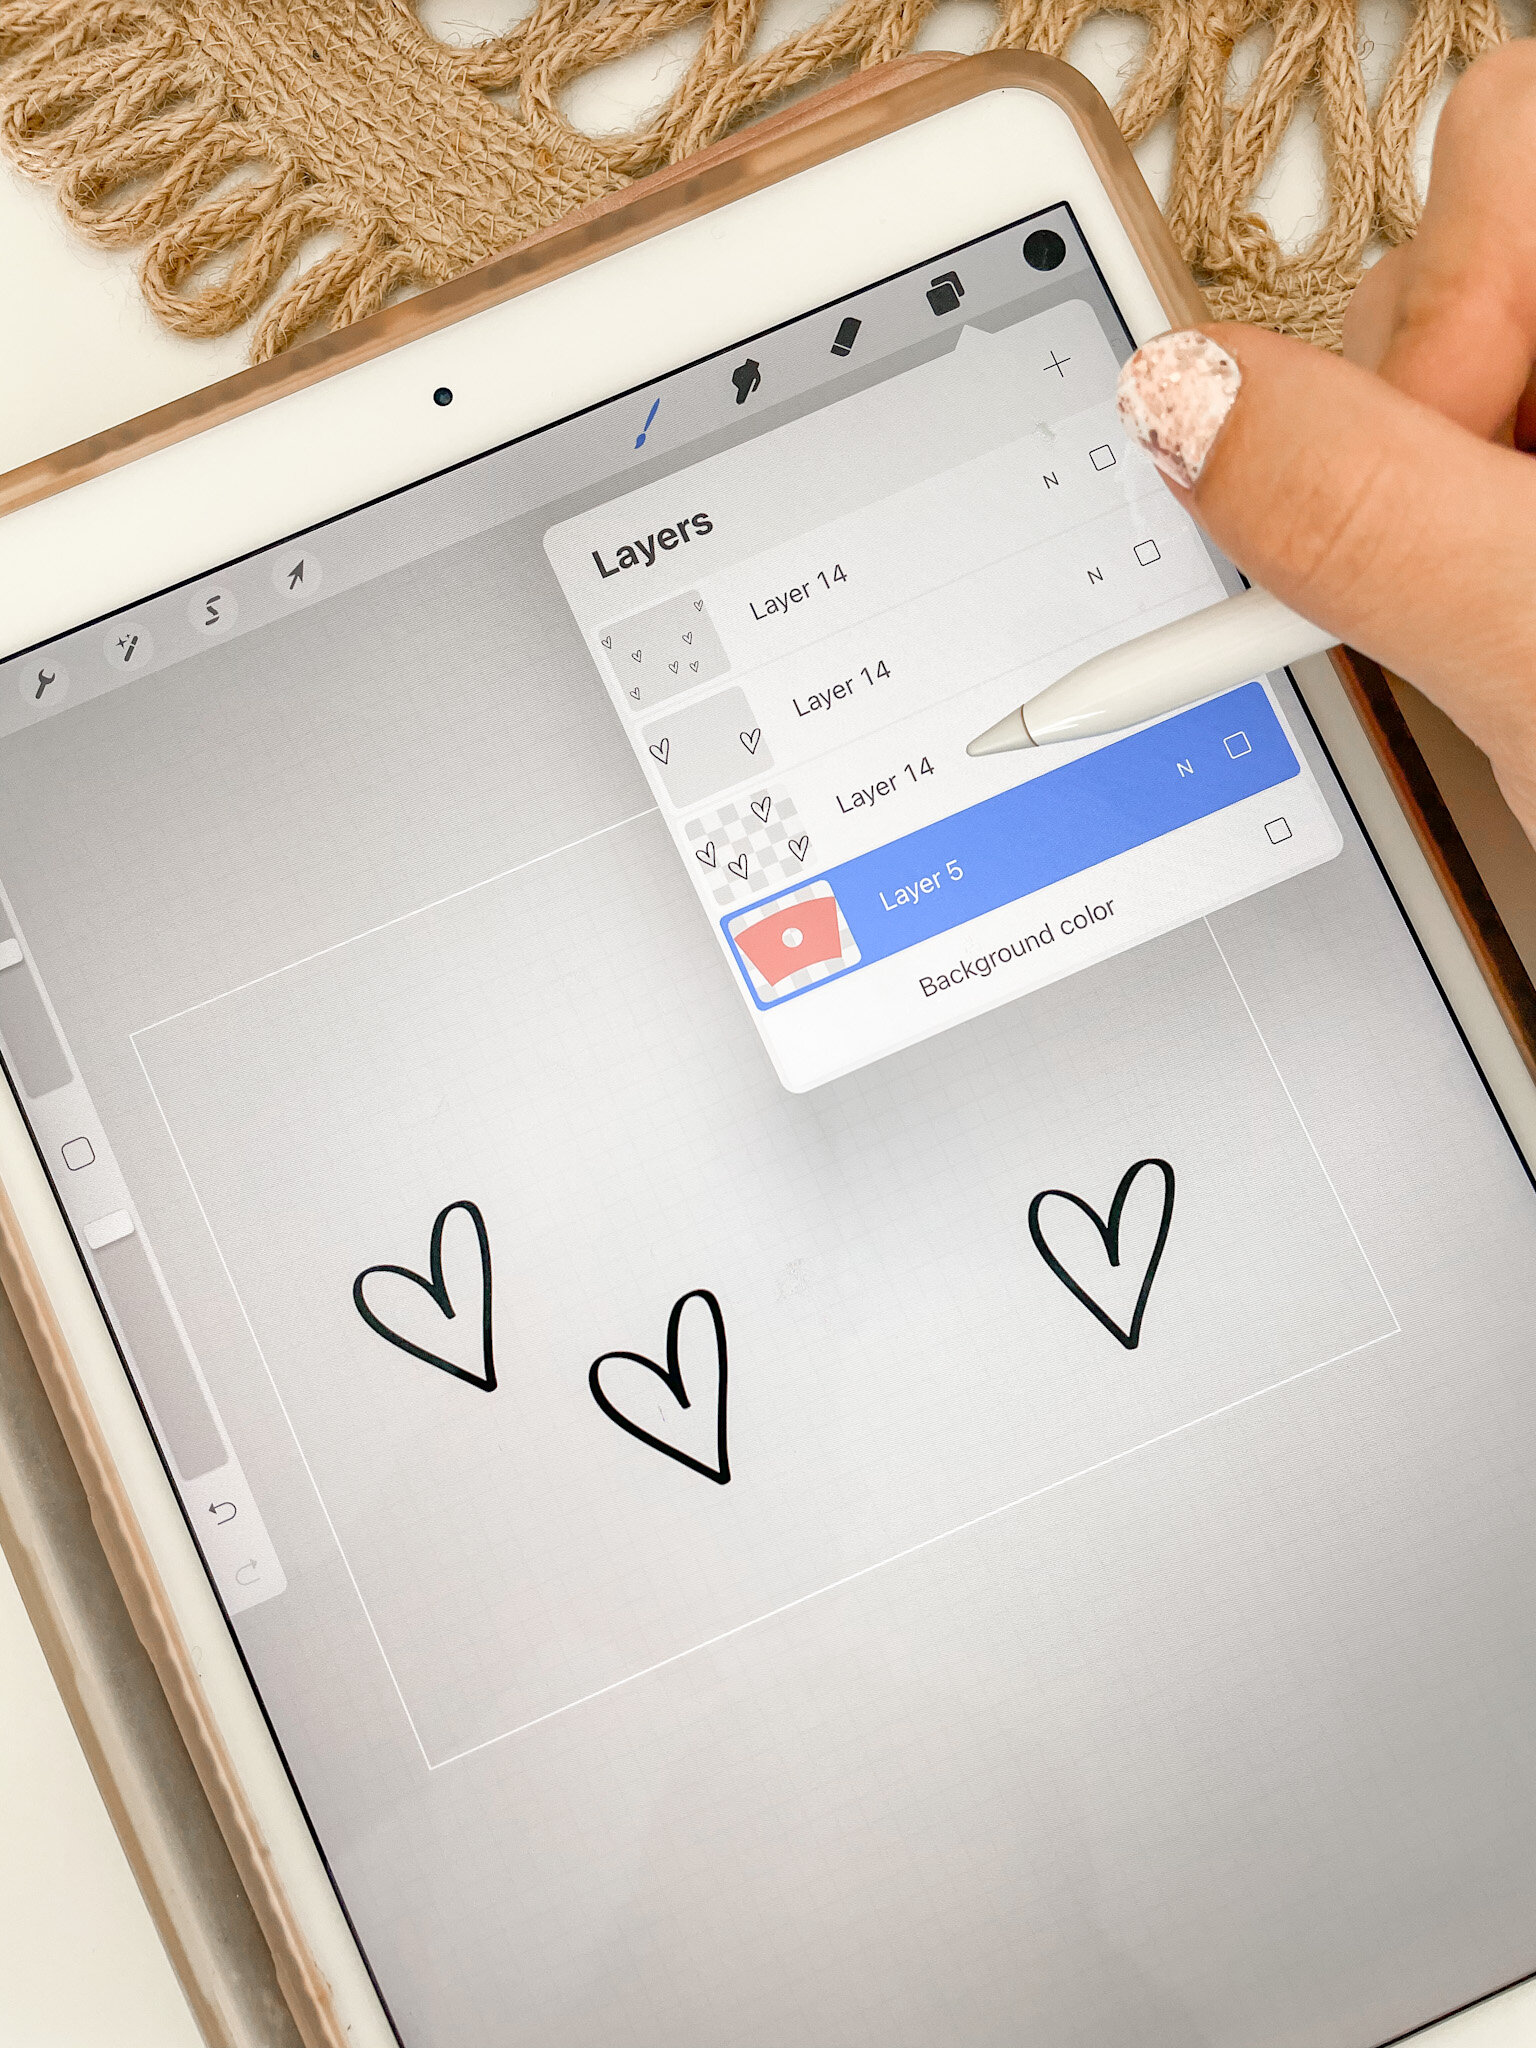
Since we’ll be cutting these in layers, we’ll go ahead and change the colors of our hearts. To do this, you’ll want to create layers by using the shape & slice tools.
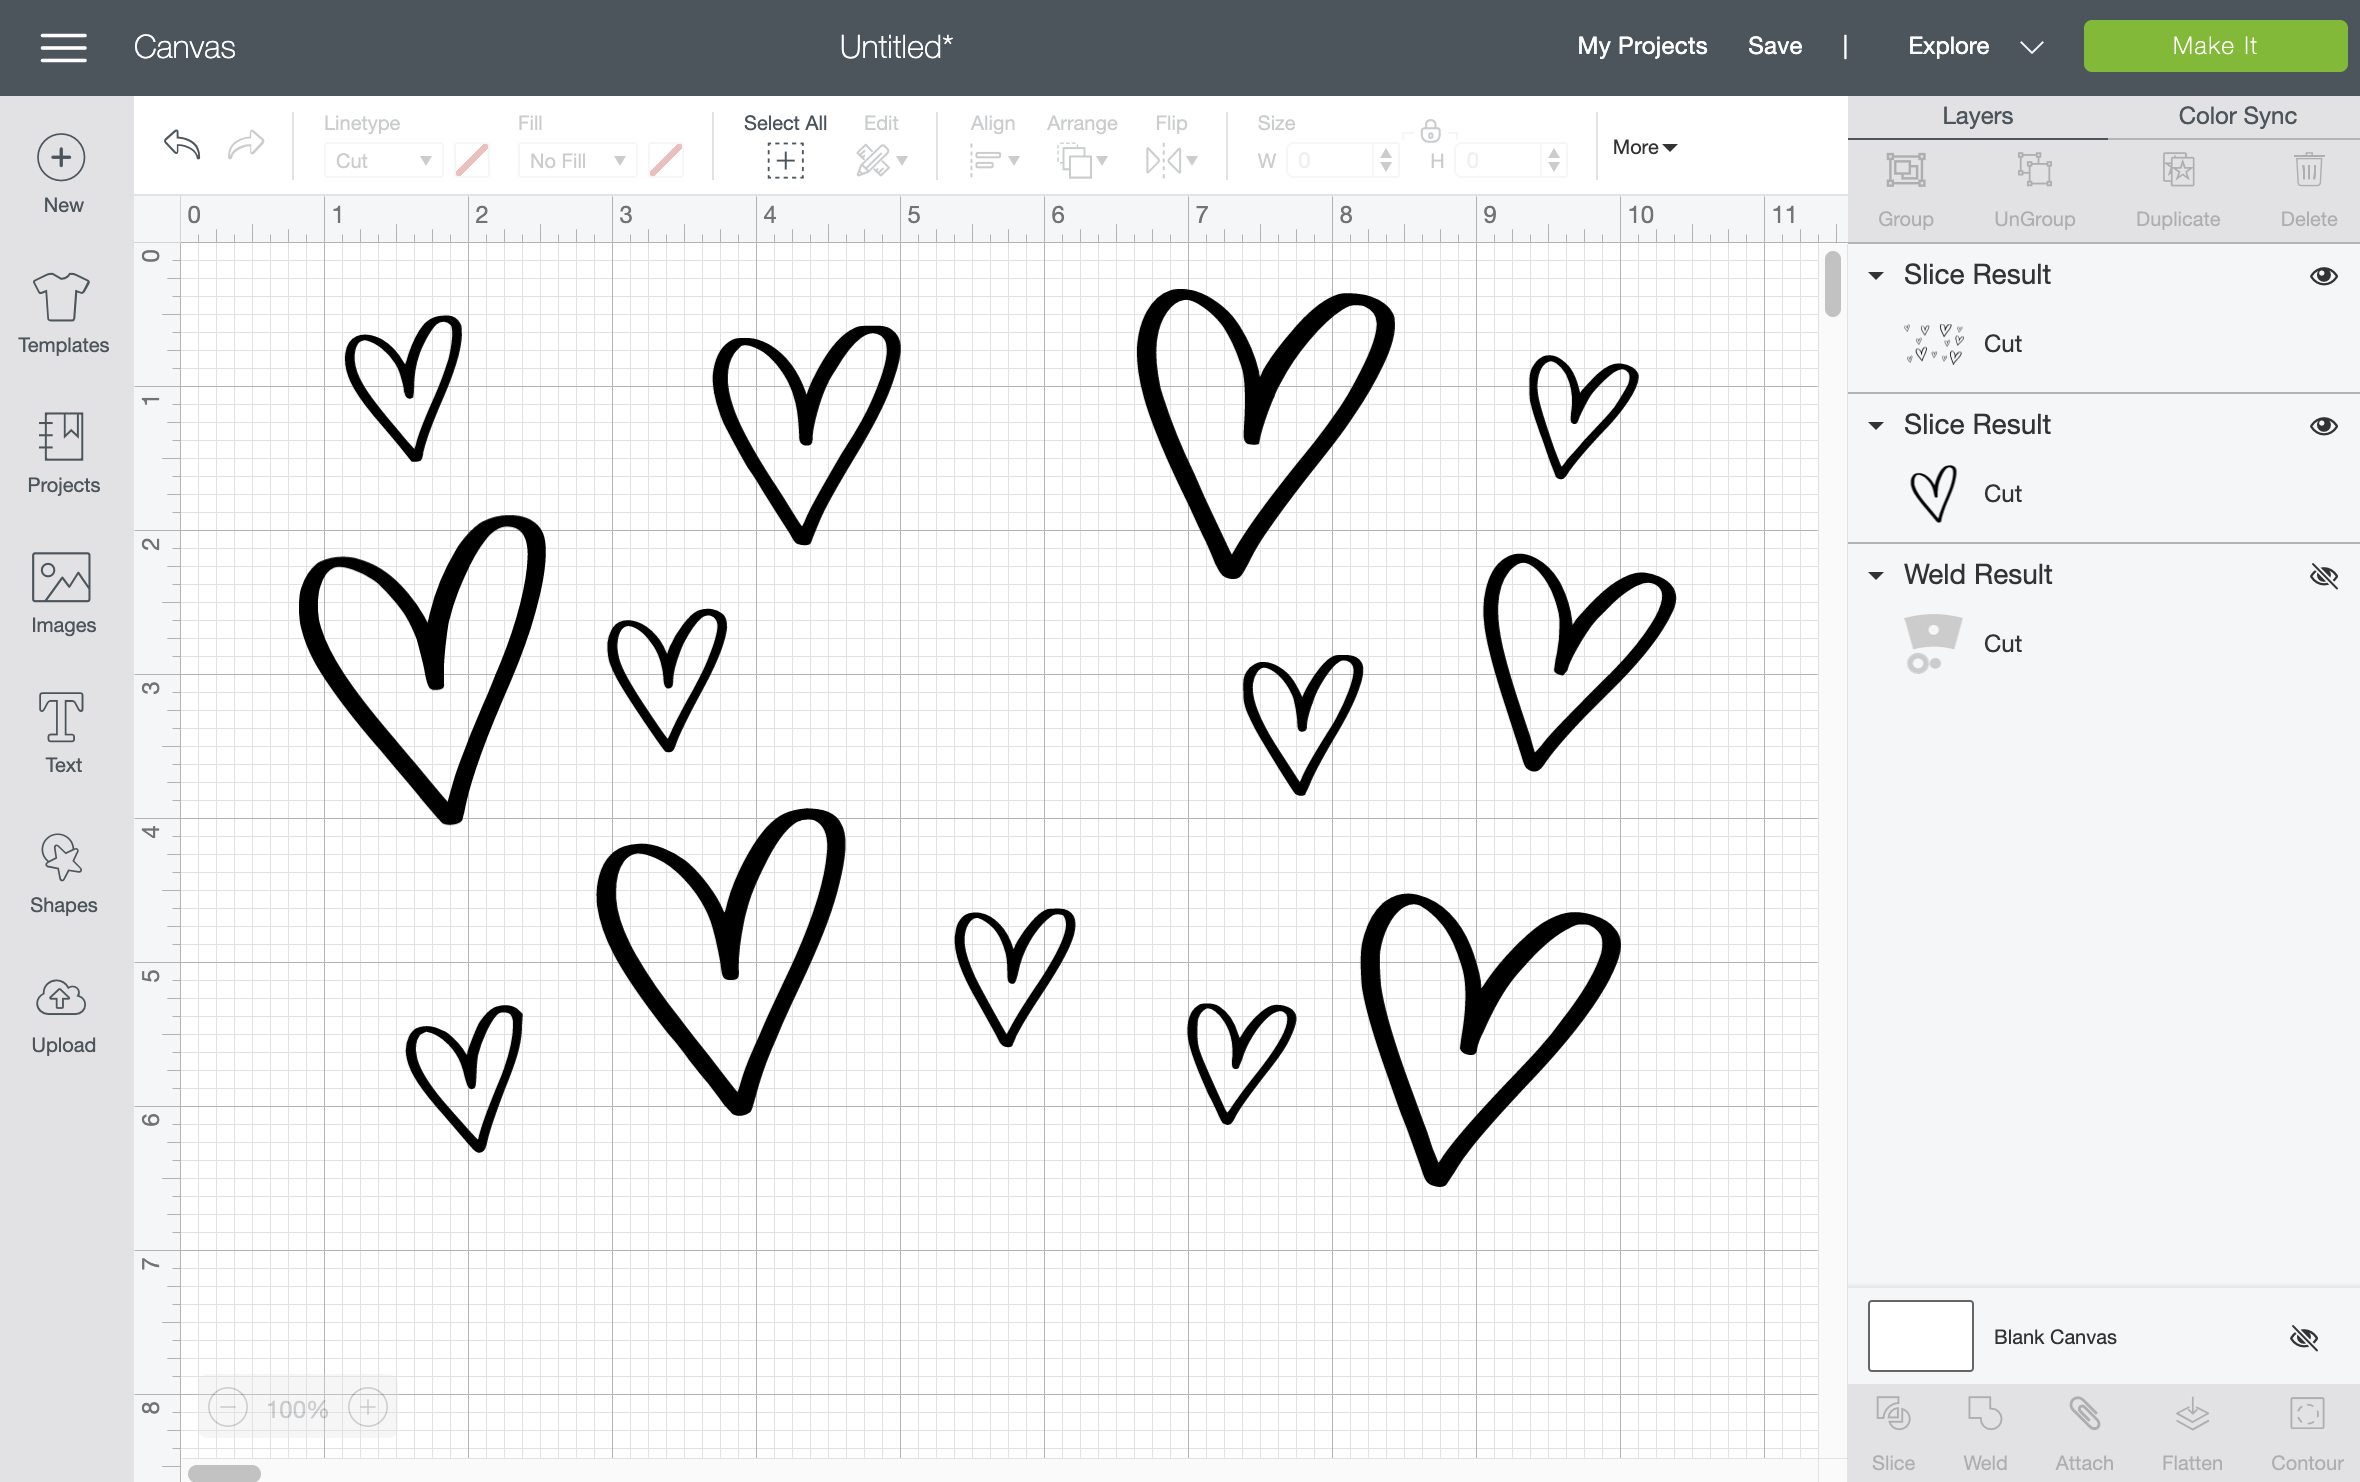
Use the shape tool to select a circle & cover one of the hearts completely. Select both the hearts layer and the circle layer over on the right, then click “Slice” at the bottom.
After deleting the extras, you’ll be left with 2 layers: your sliced out heart, and all the rest of the hearts together.

This way all the hearts of the same size will end up the same color. You can also see I’ve “hidden” (just tap the eye icon) the wrap template underneath since we no longer need it.
Continue the shape & slicing steps until you’ve gotten all 4 of your large hearts sliced.
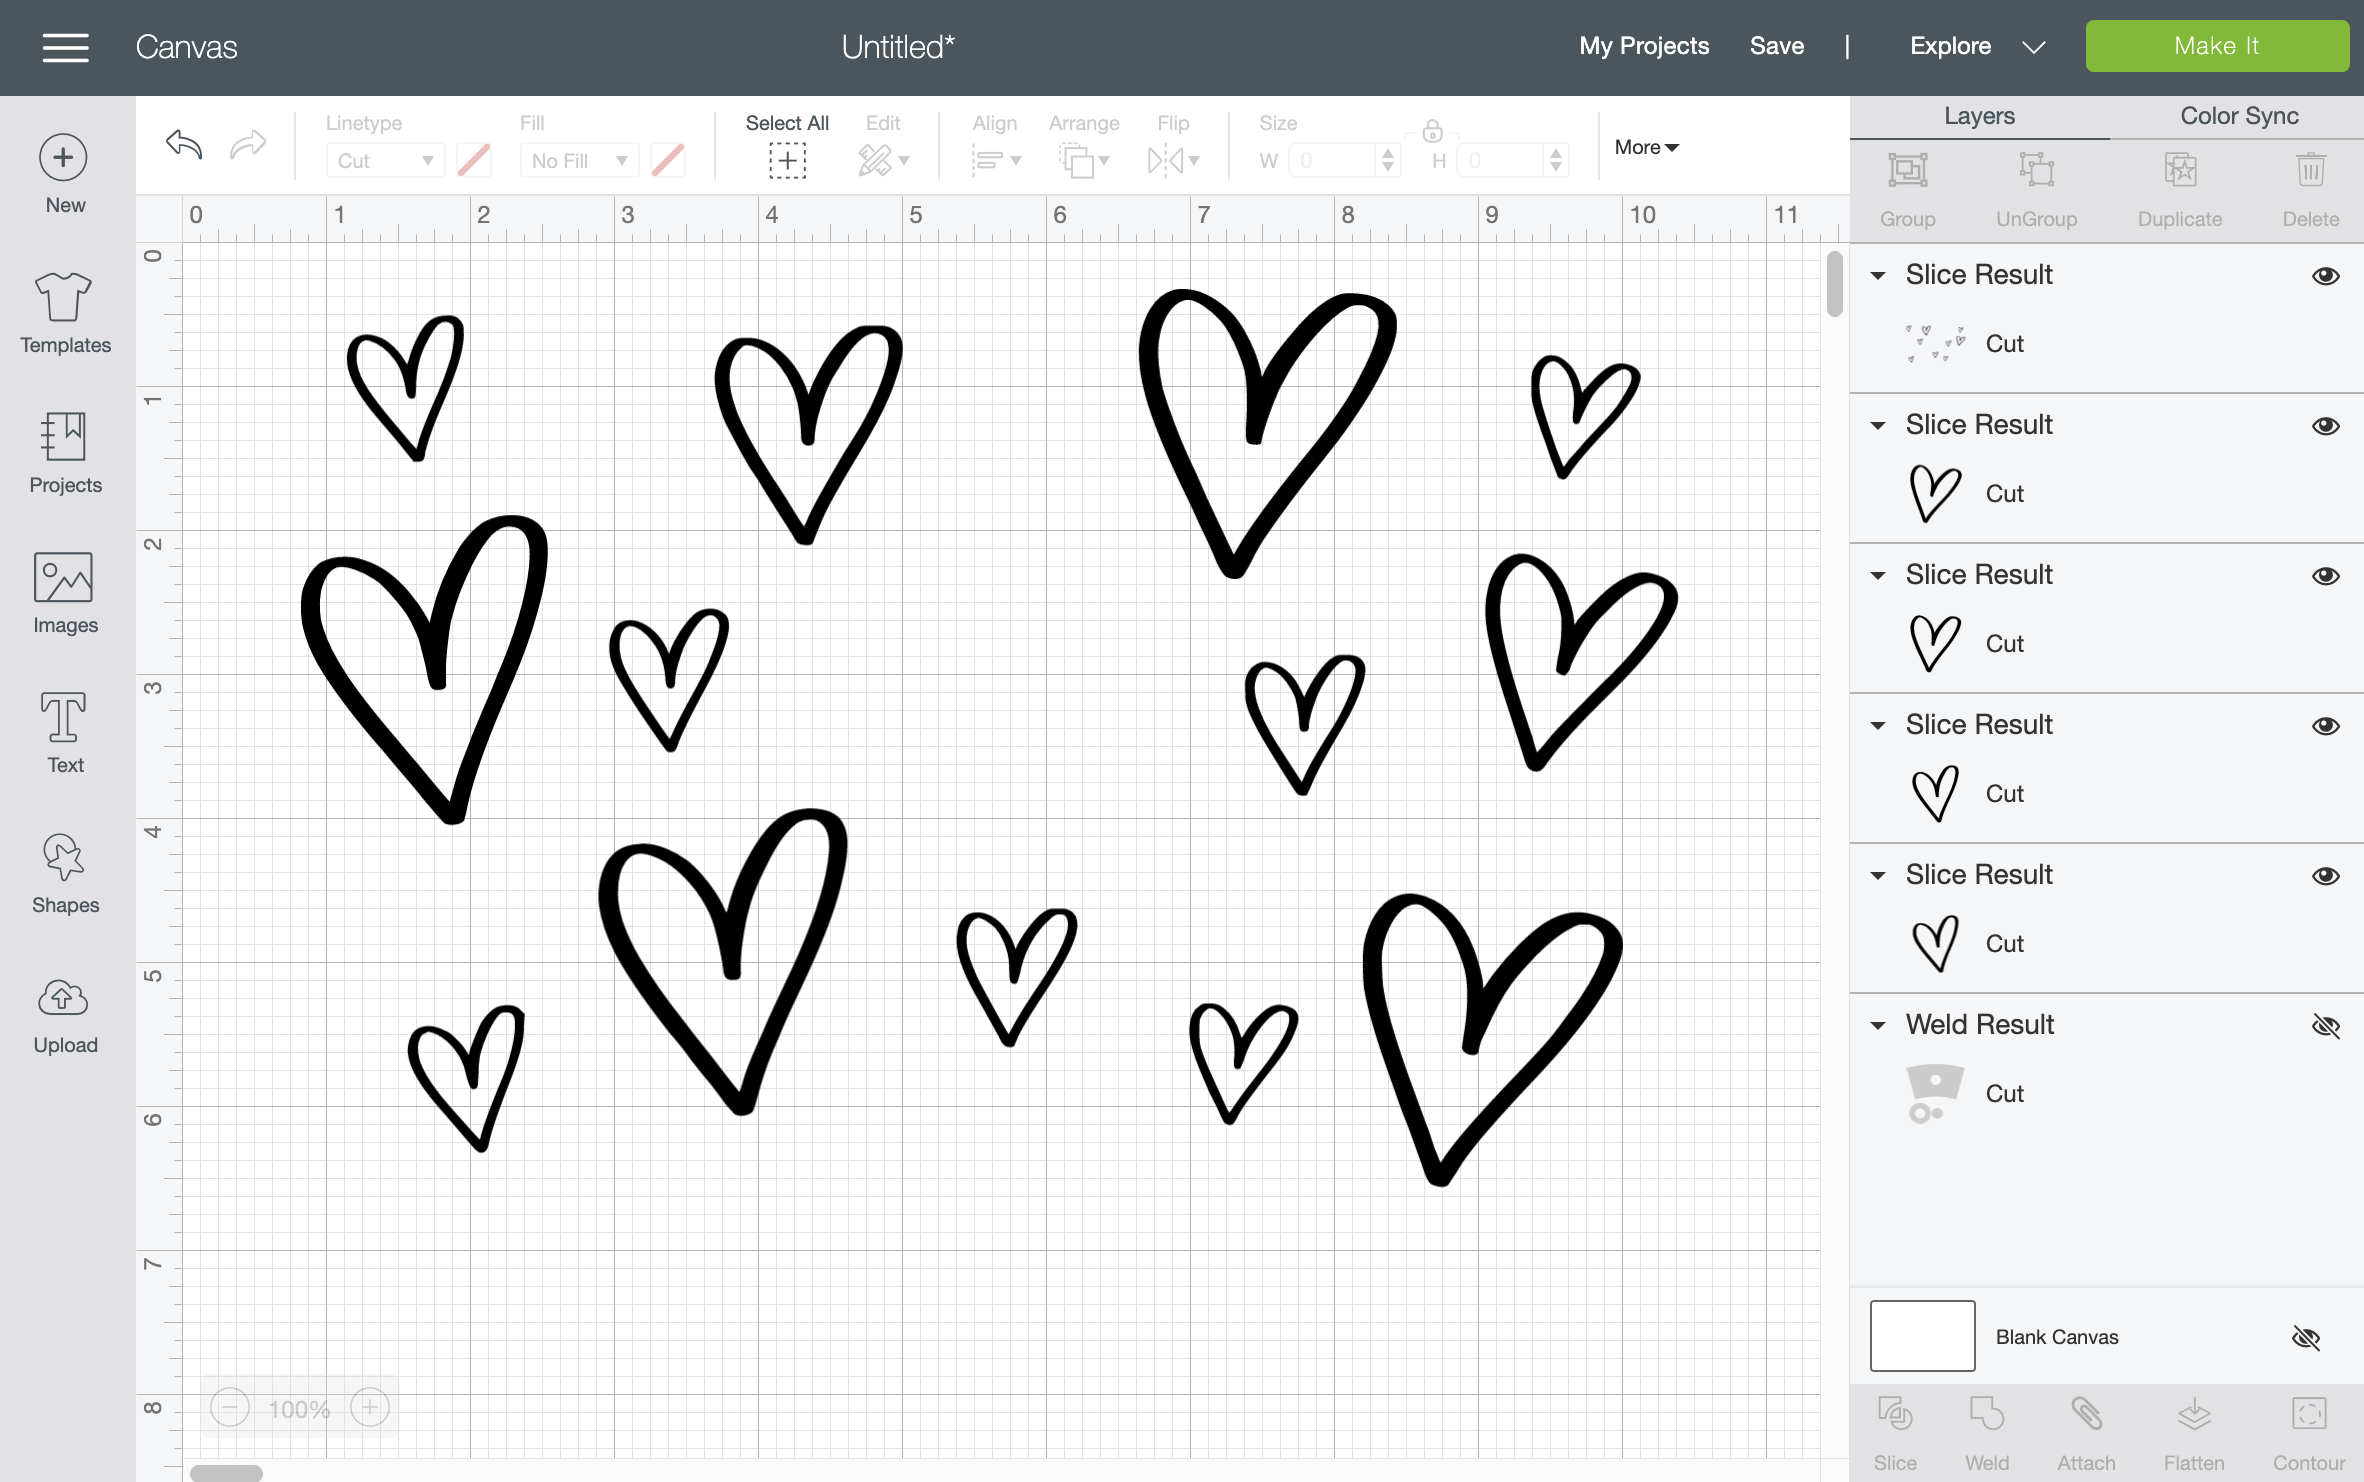
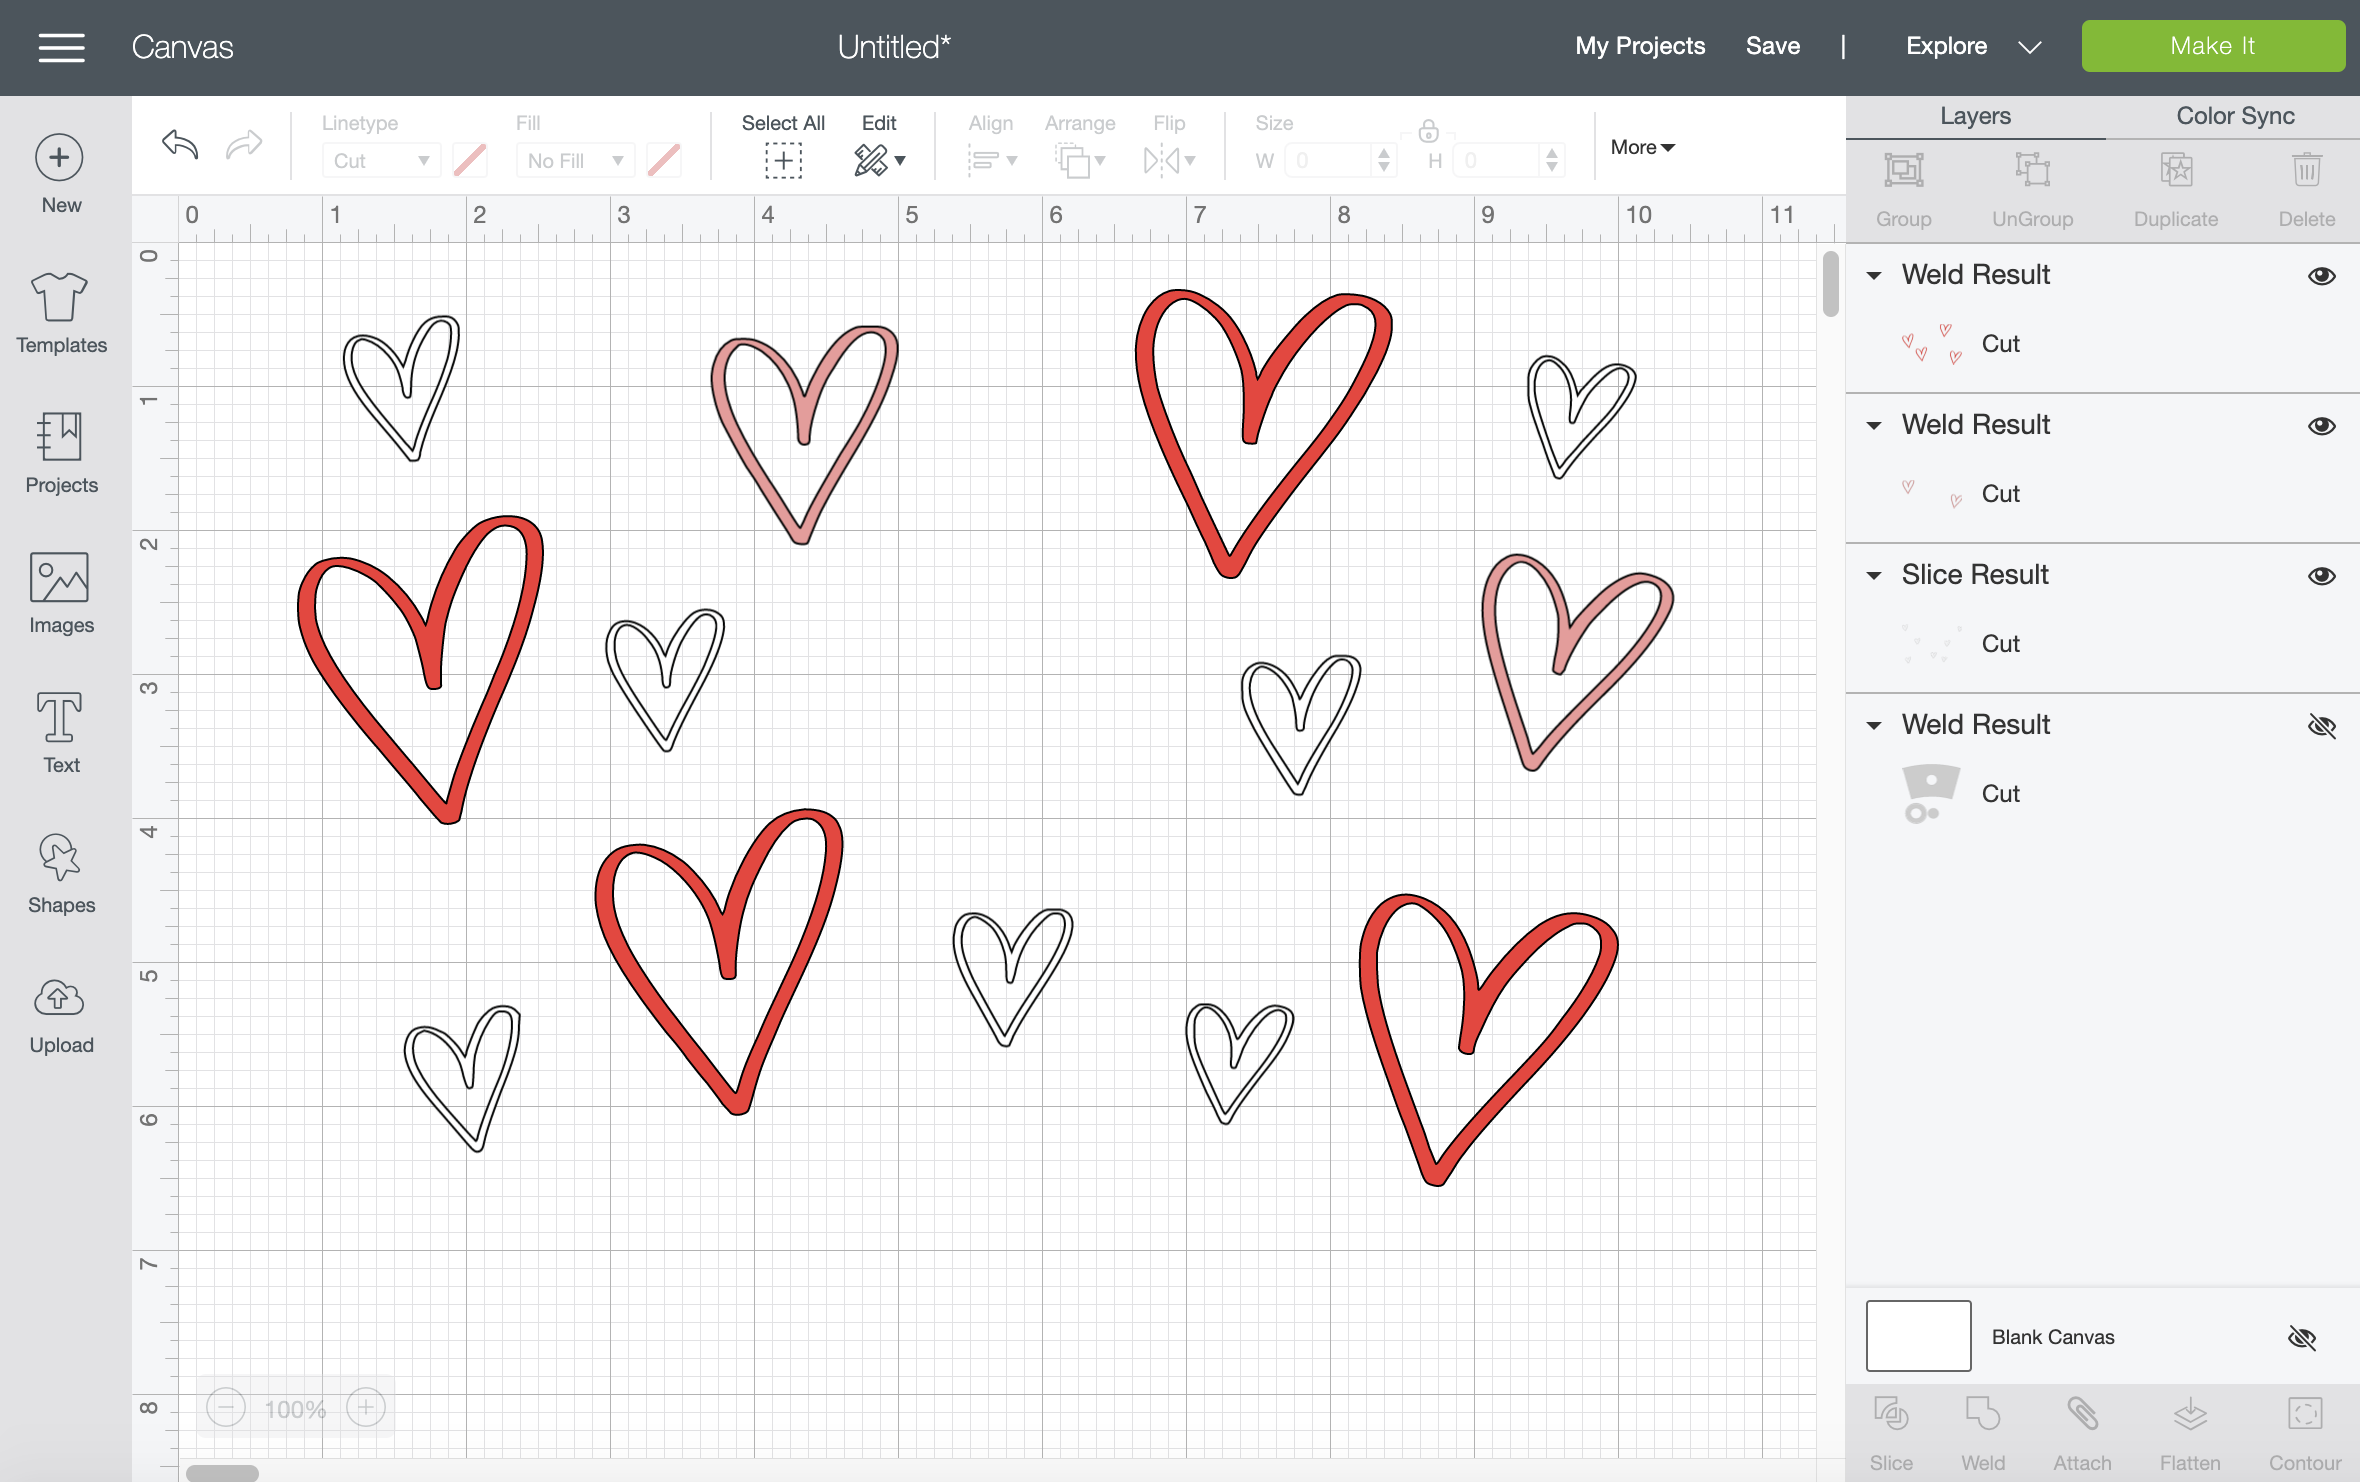
Now you can select all 4 of those heart layers at the same time, and click “Group” at the top. This will group them together so that you can make them all the same color.
I’ll make all of these red just for fun.

Repeat the steps above for your two middle sized hearts. This time after grouping them together, I’ll choose the color pink.

Lastly, I’ll select my final layer of all the tiny hearts together and make them all white.
Tip: before clicking “Make It” make sure that your layers are welded together like my white one for example. Since that’s the only one welded, I’ll select all of my red hearts and “Weld” as well as all of my pink hearts together and “Weld”.

You should end up with a Canvas that looks like this with just three layers that will be cut (since the template is still invisible). Click “Make It” at the top and now it’s time to cut!
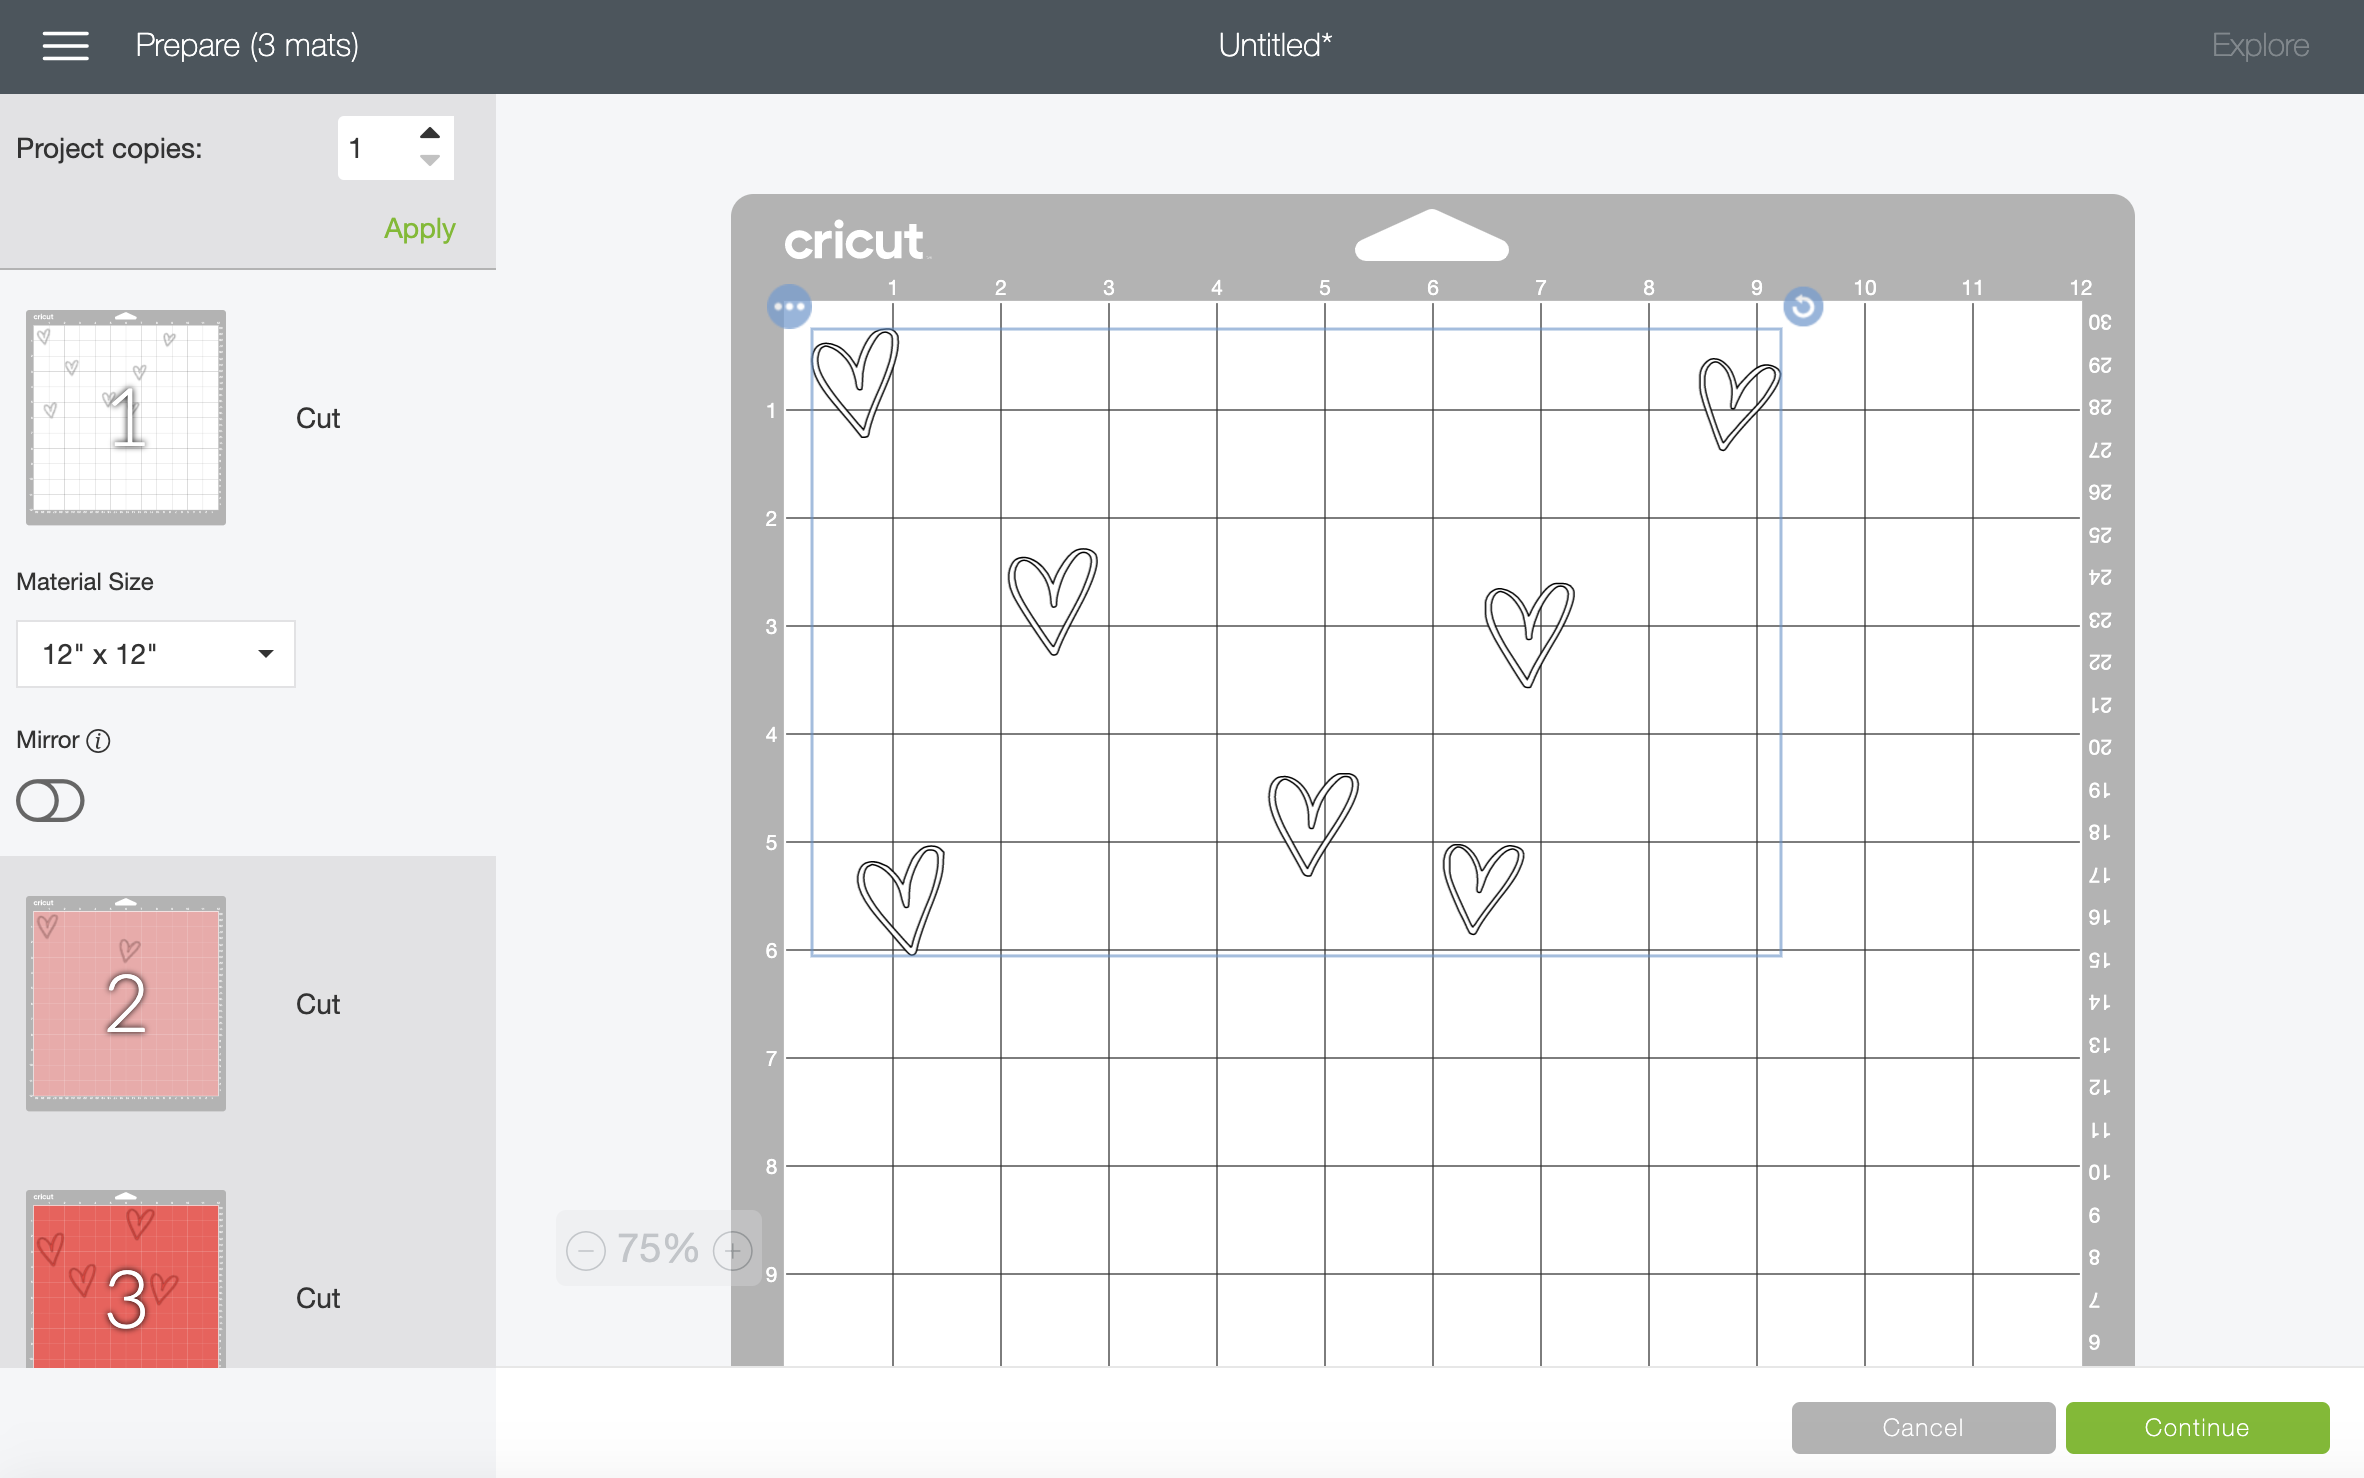
Step Three: Cut
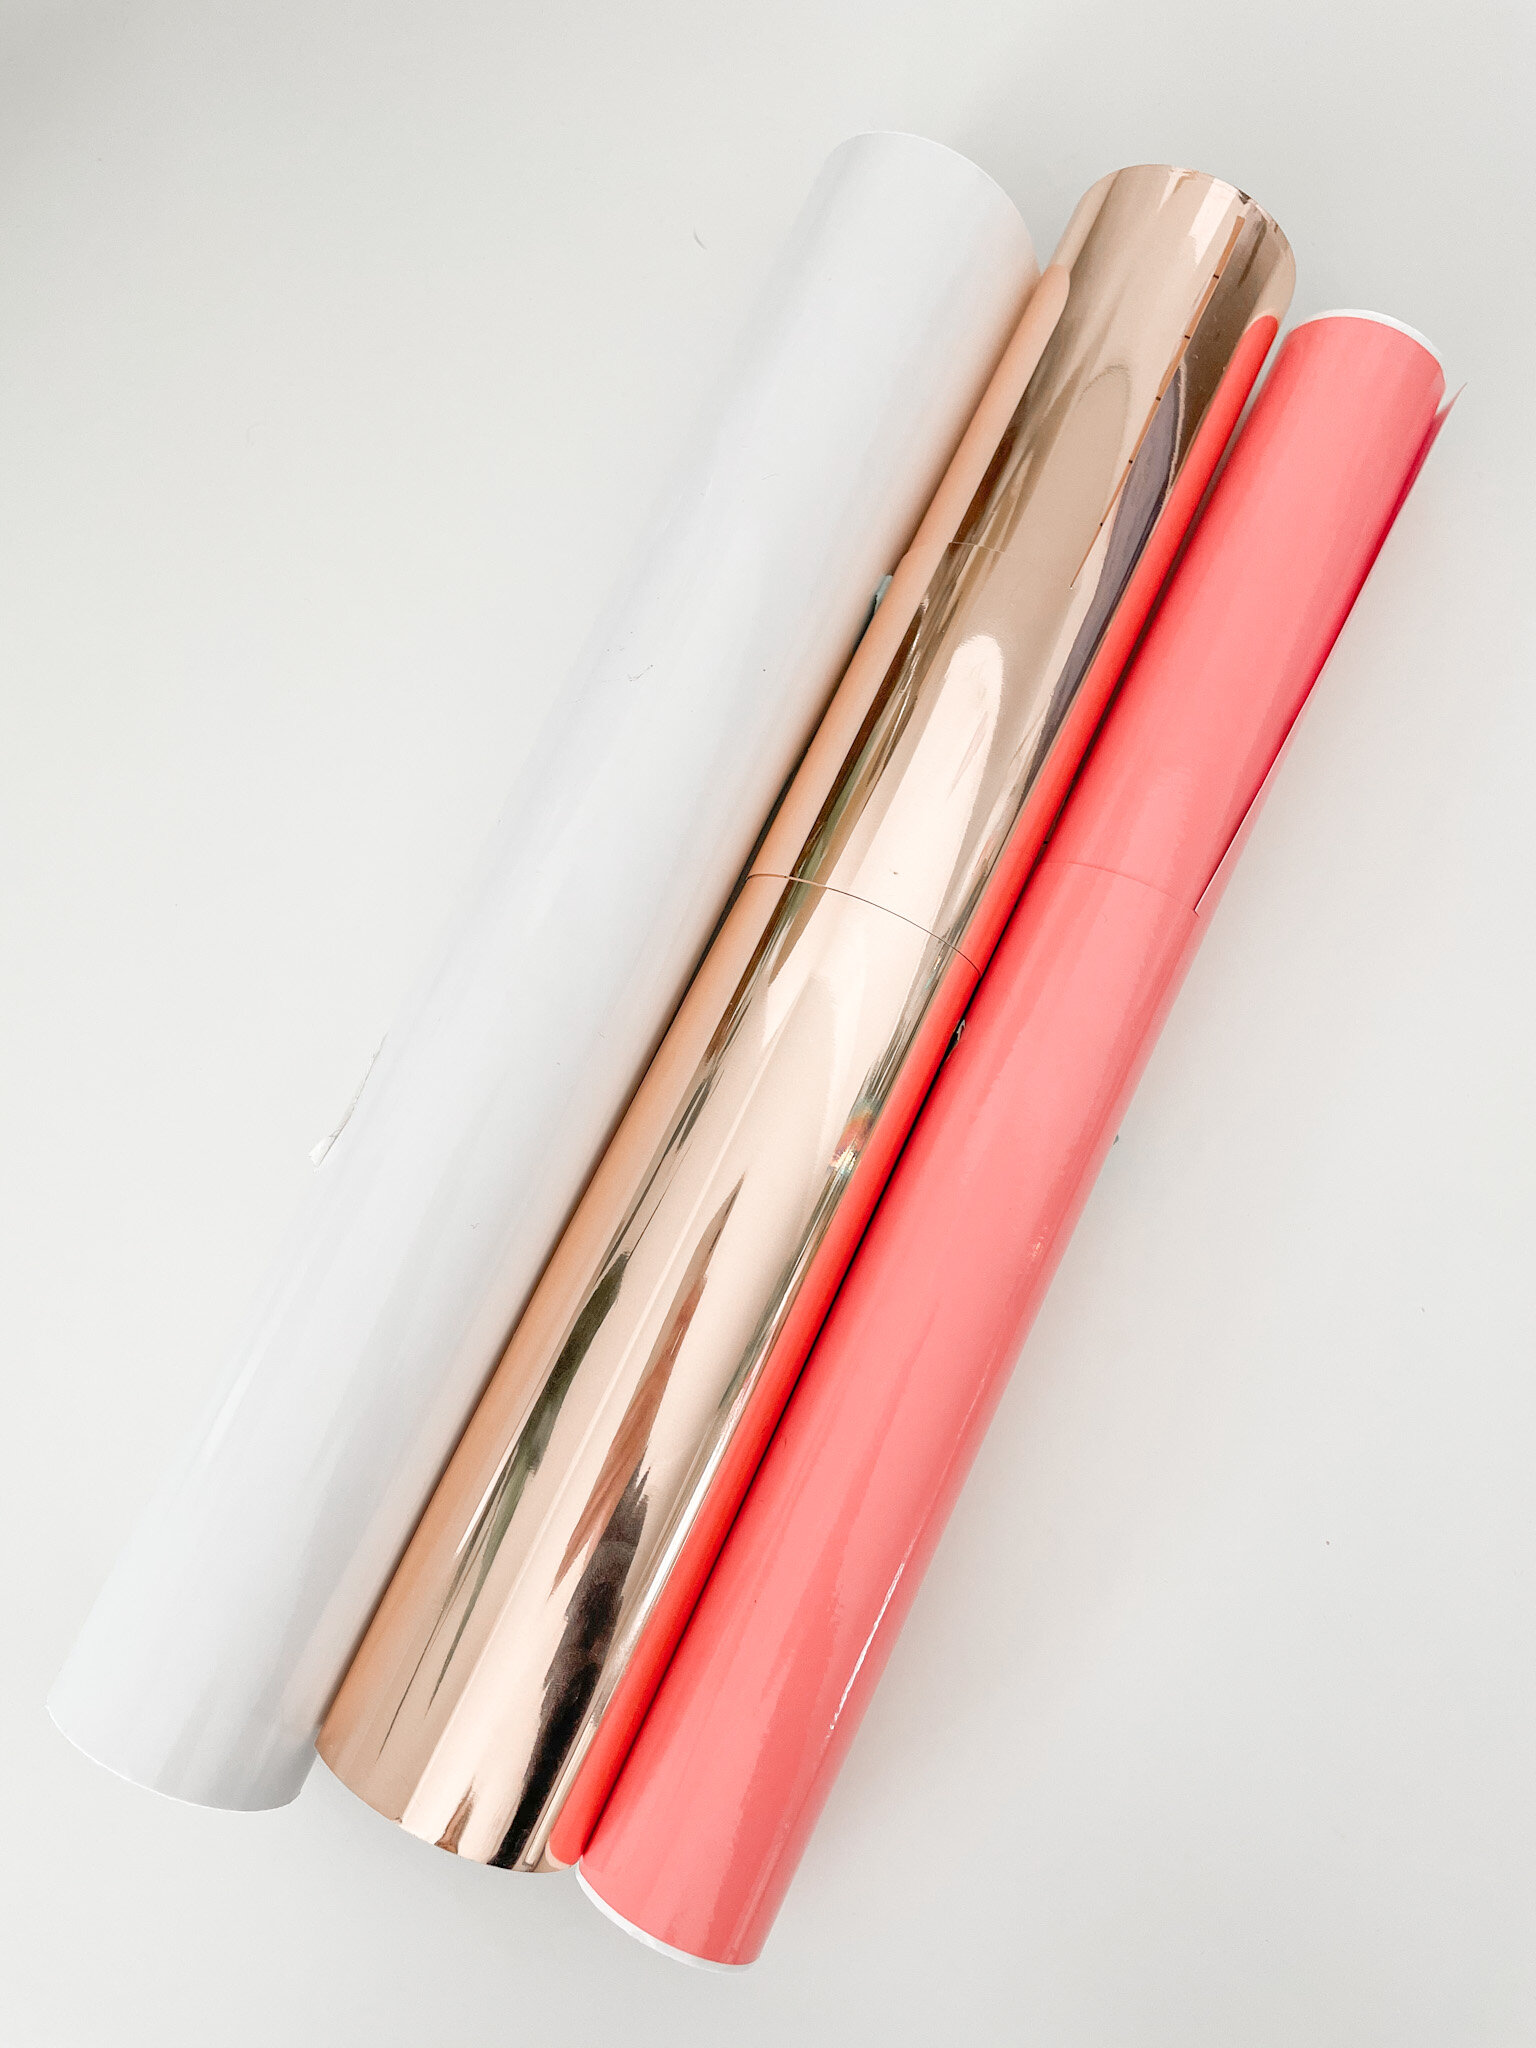
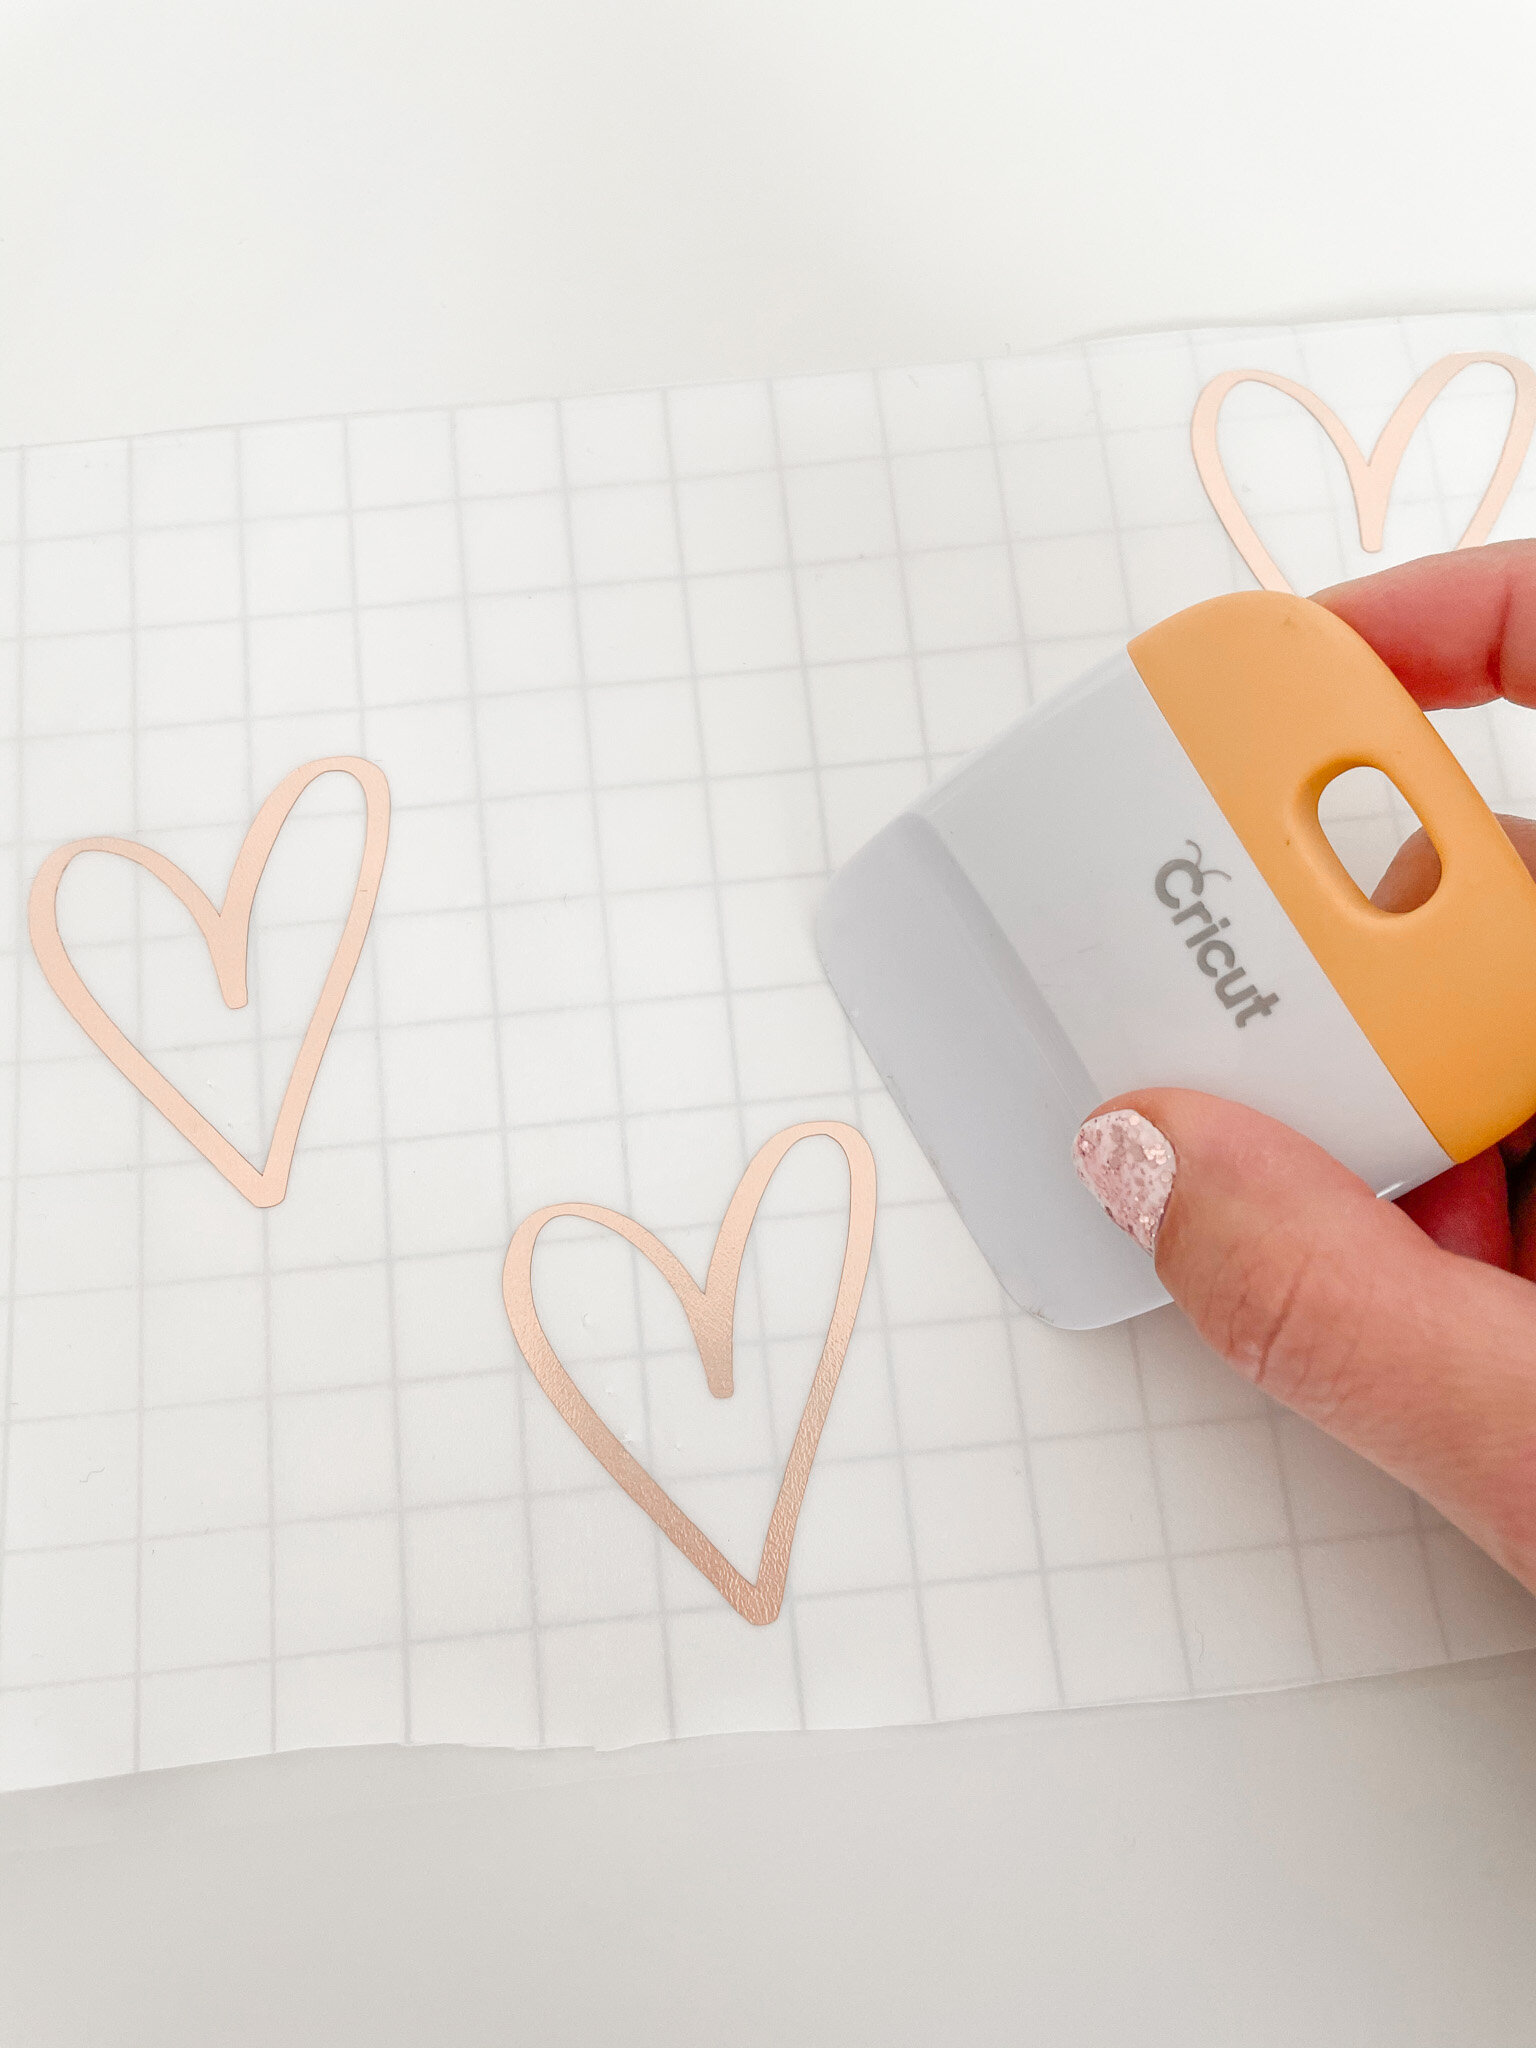
Grab your three favorite vinyl colors and cut them to size. I’ll be using rose gold foil, coral, and white.
Use the cutting mat photos to determine the size to cut your vinyl. We’ll first need a sheet of white that is roughly 9.5” wide and about 6.25” tall.
Load your vinyl on your mat into your cutting machine, & click Continue. The Cricut will work it’s magic for you!
Repeat these steps to cut all three colors.
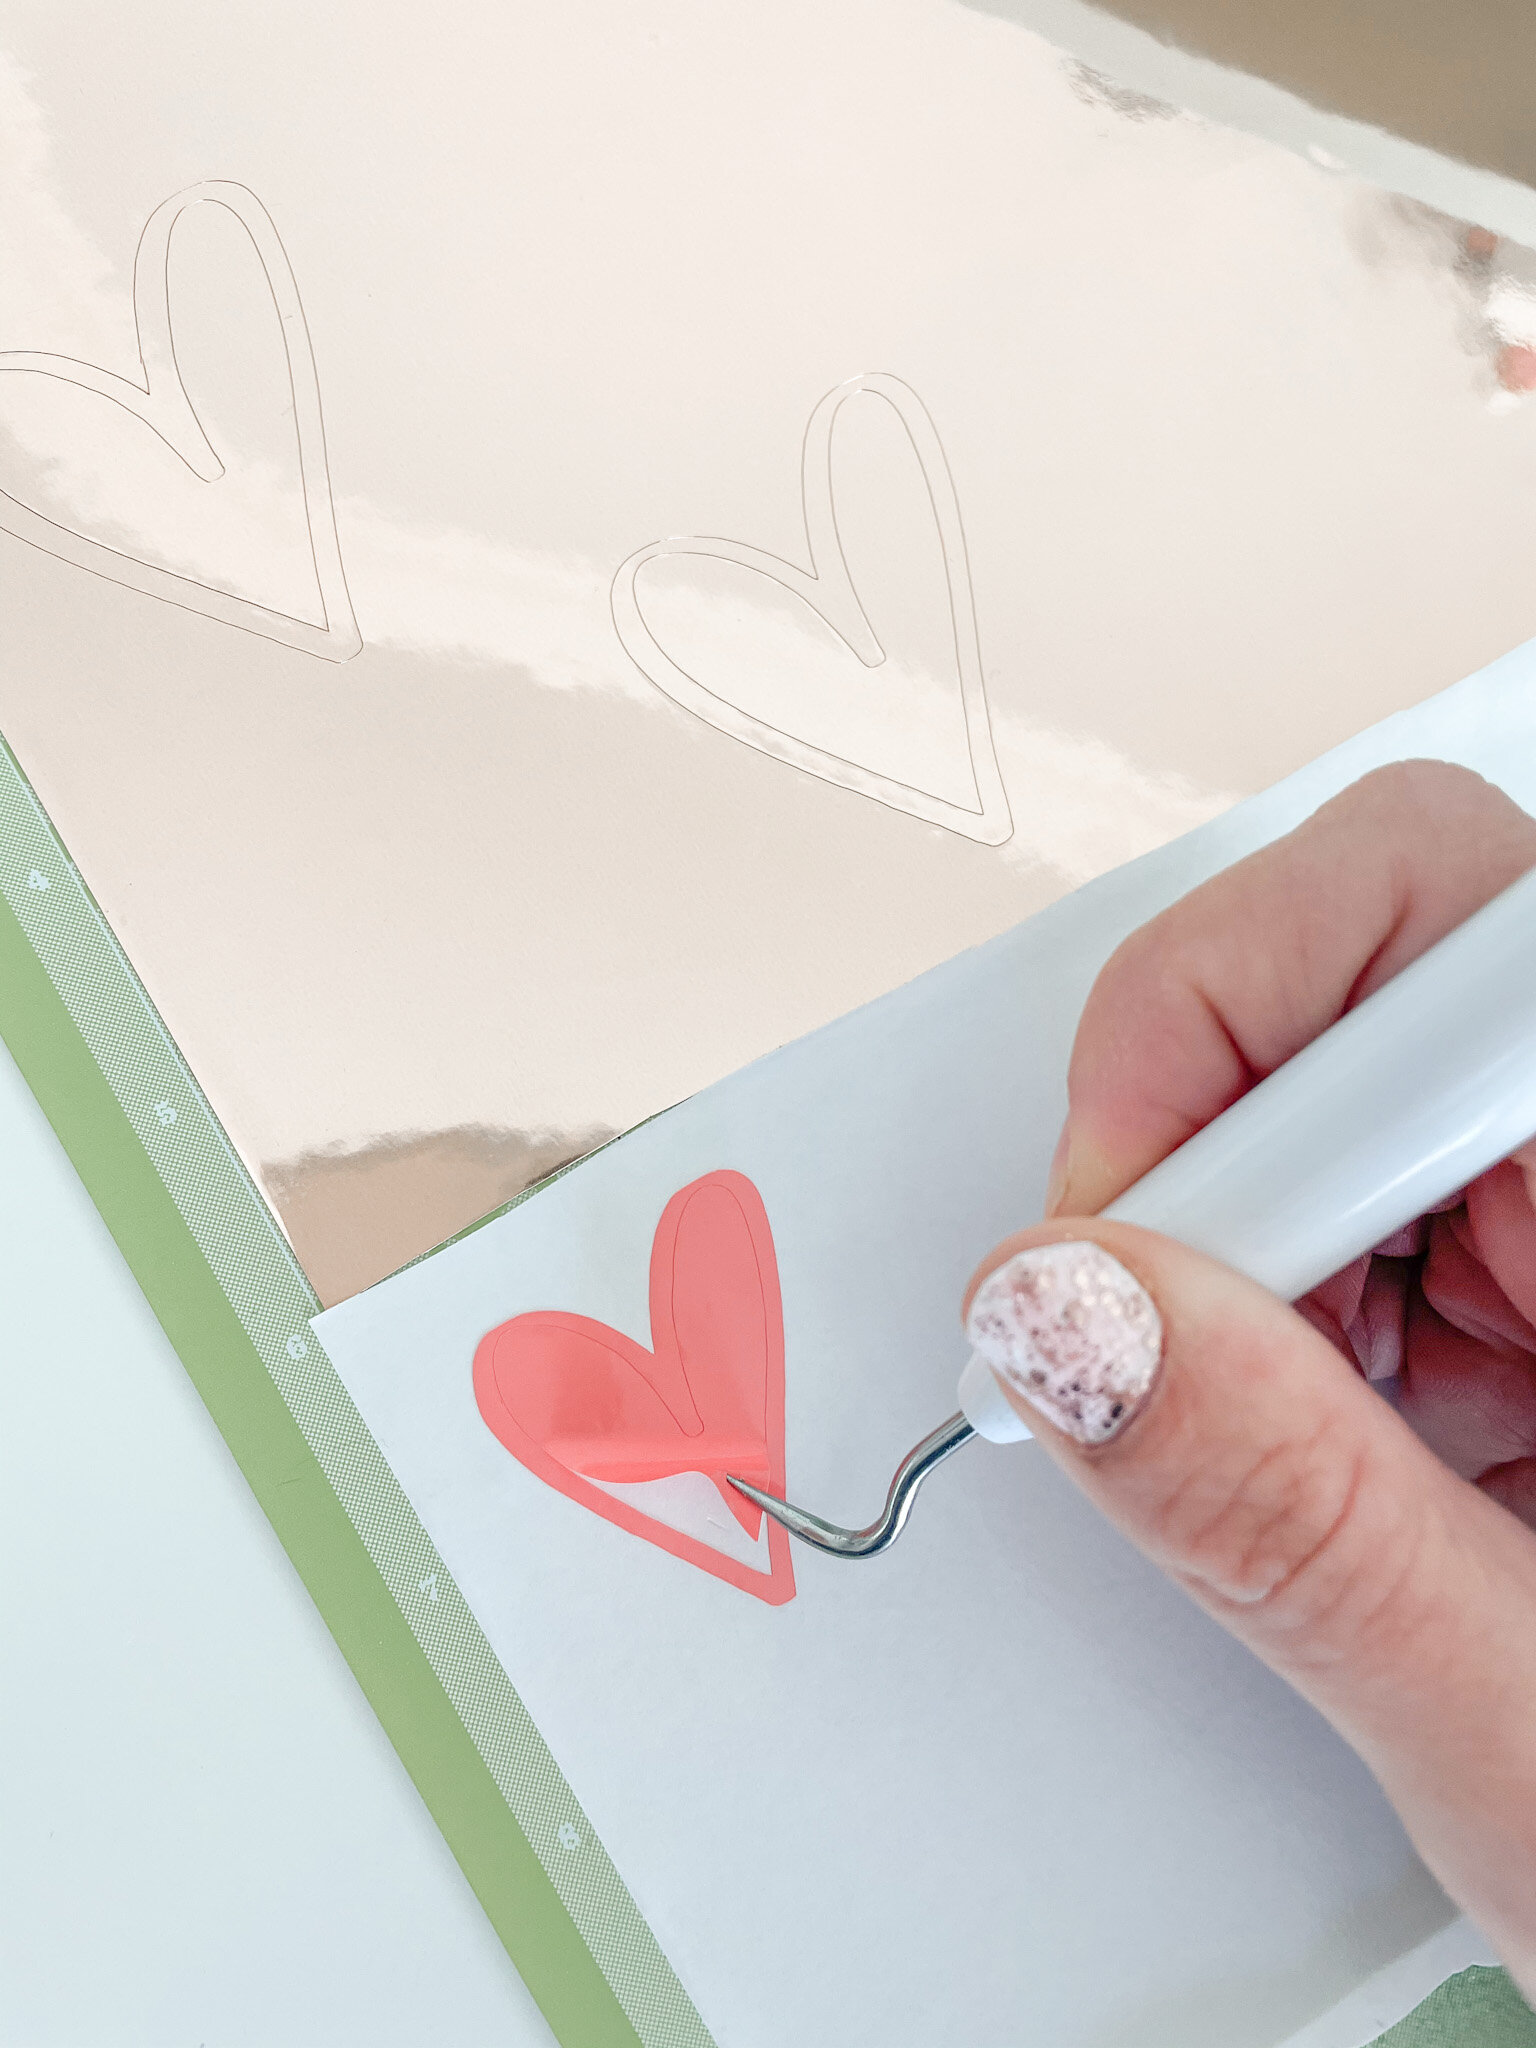
Once it’s all cut, use your weeder tool to remove the extra vinyl and apply clear transfer tape on top. Use your scraper tool to make sure the transfer tape is adhered well.
Remove the transfer tape to reveal your design without the backing.
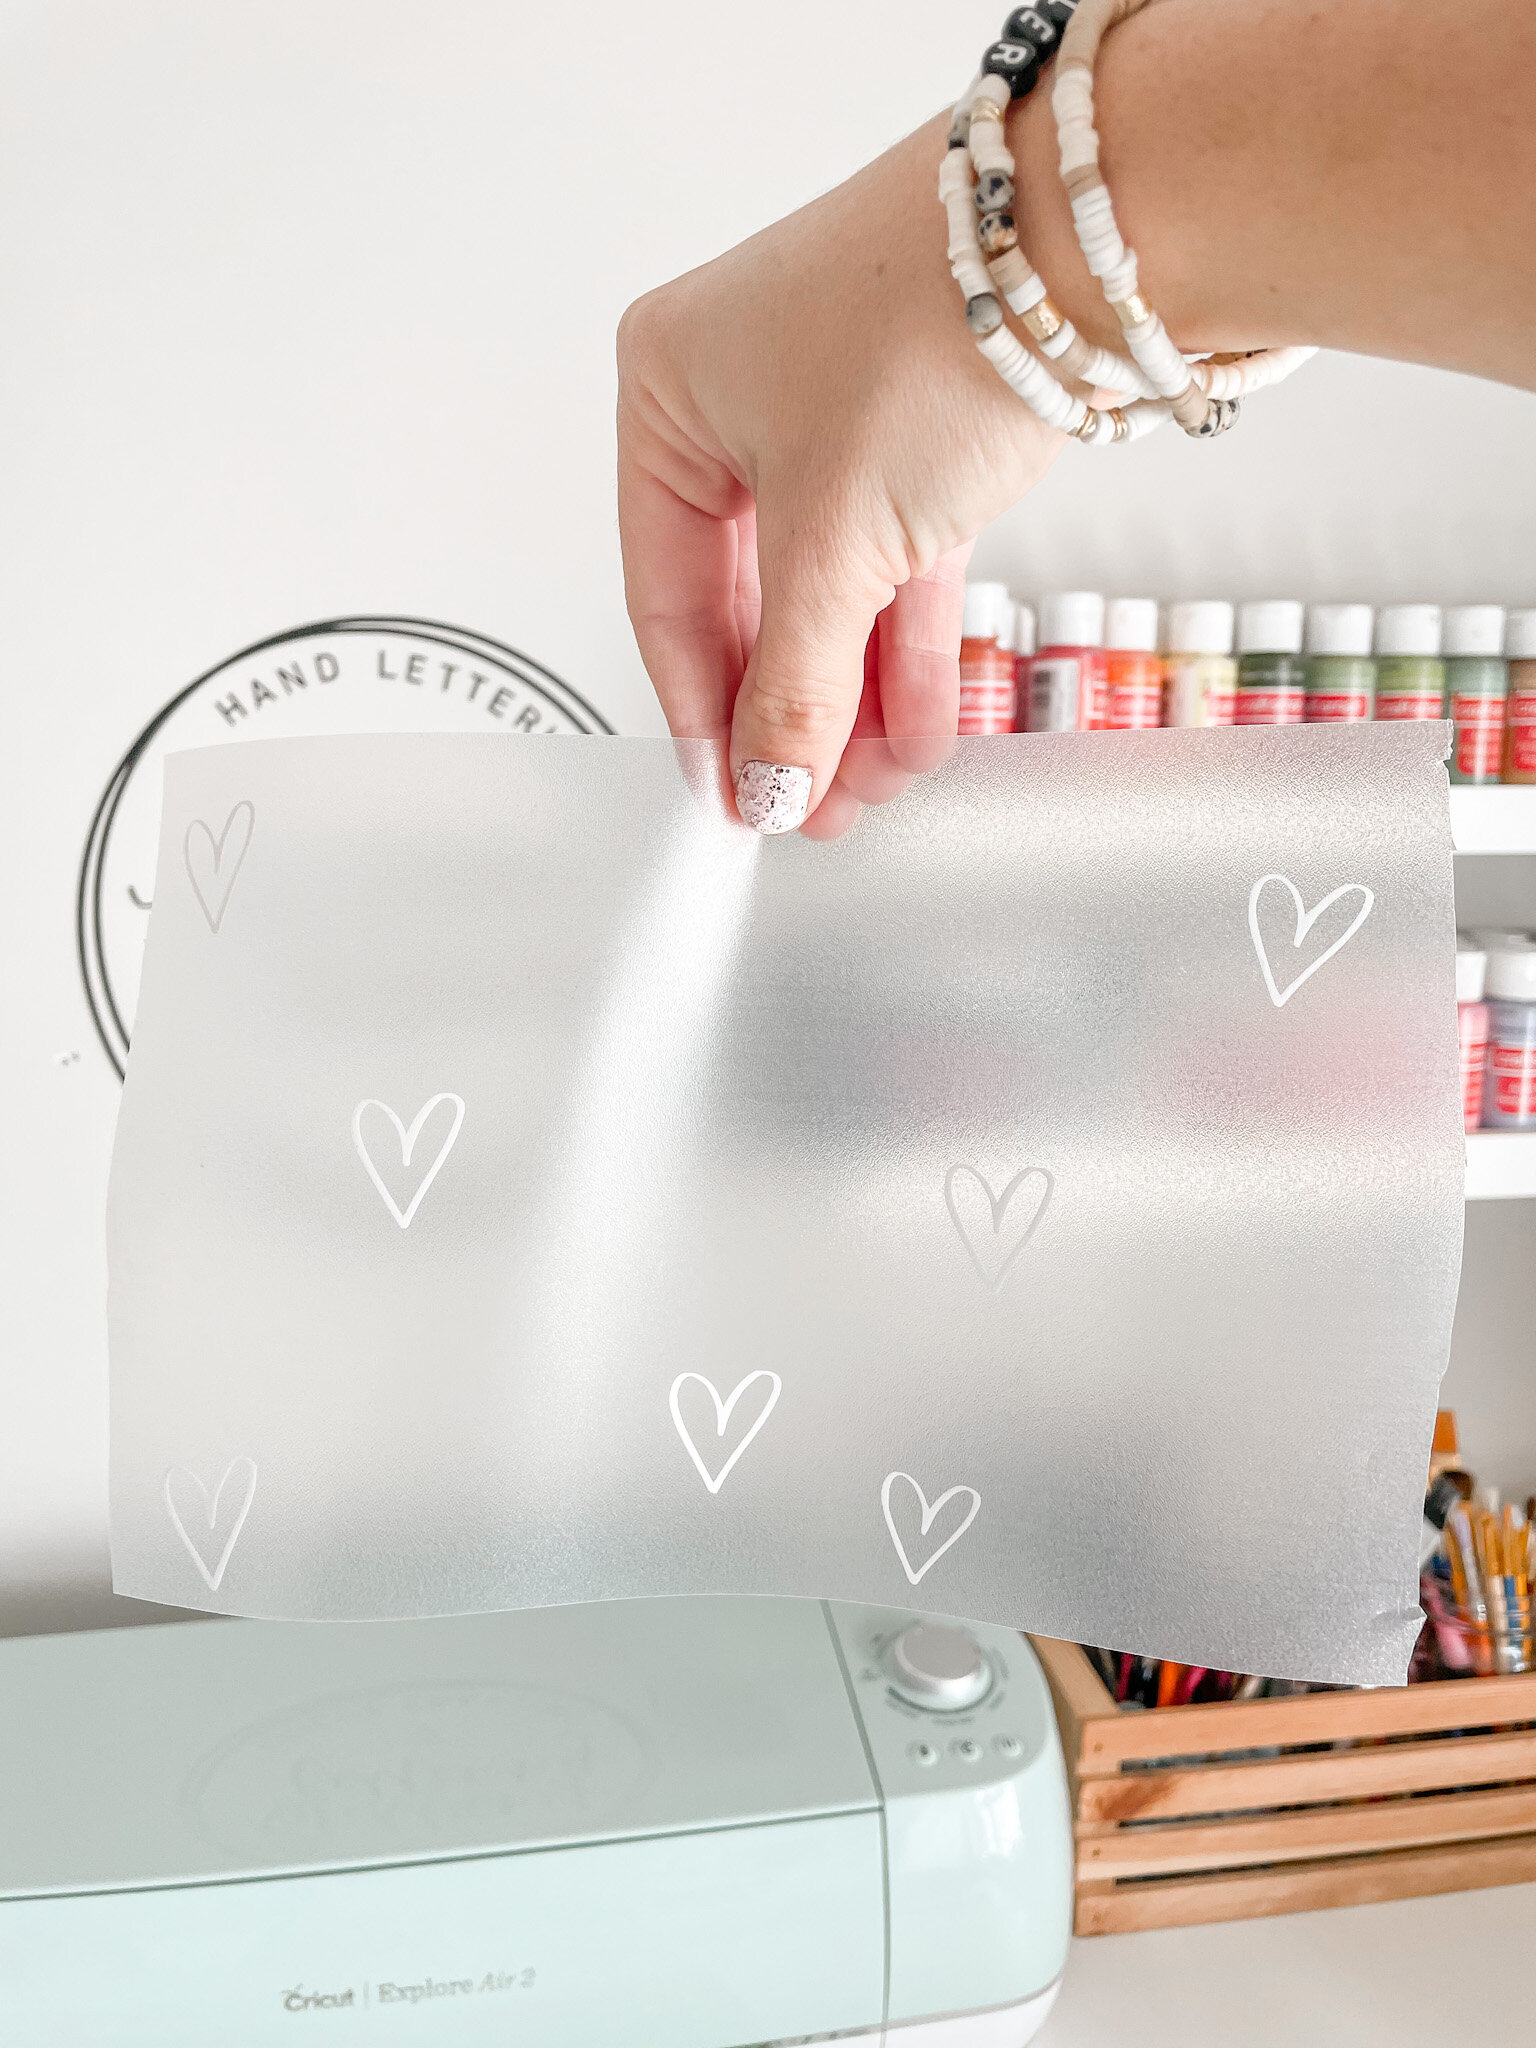
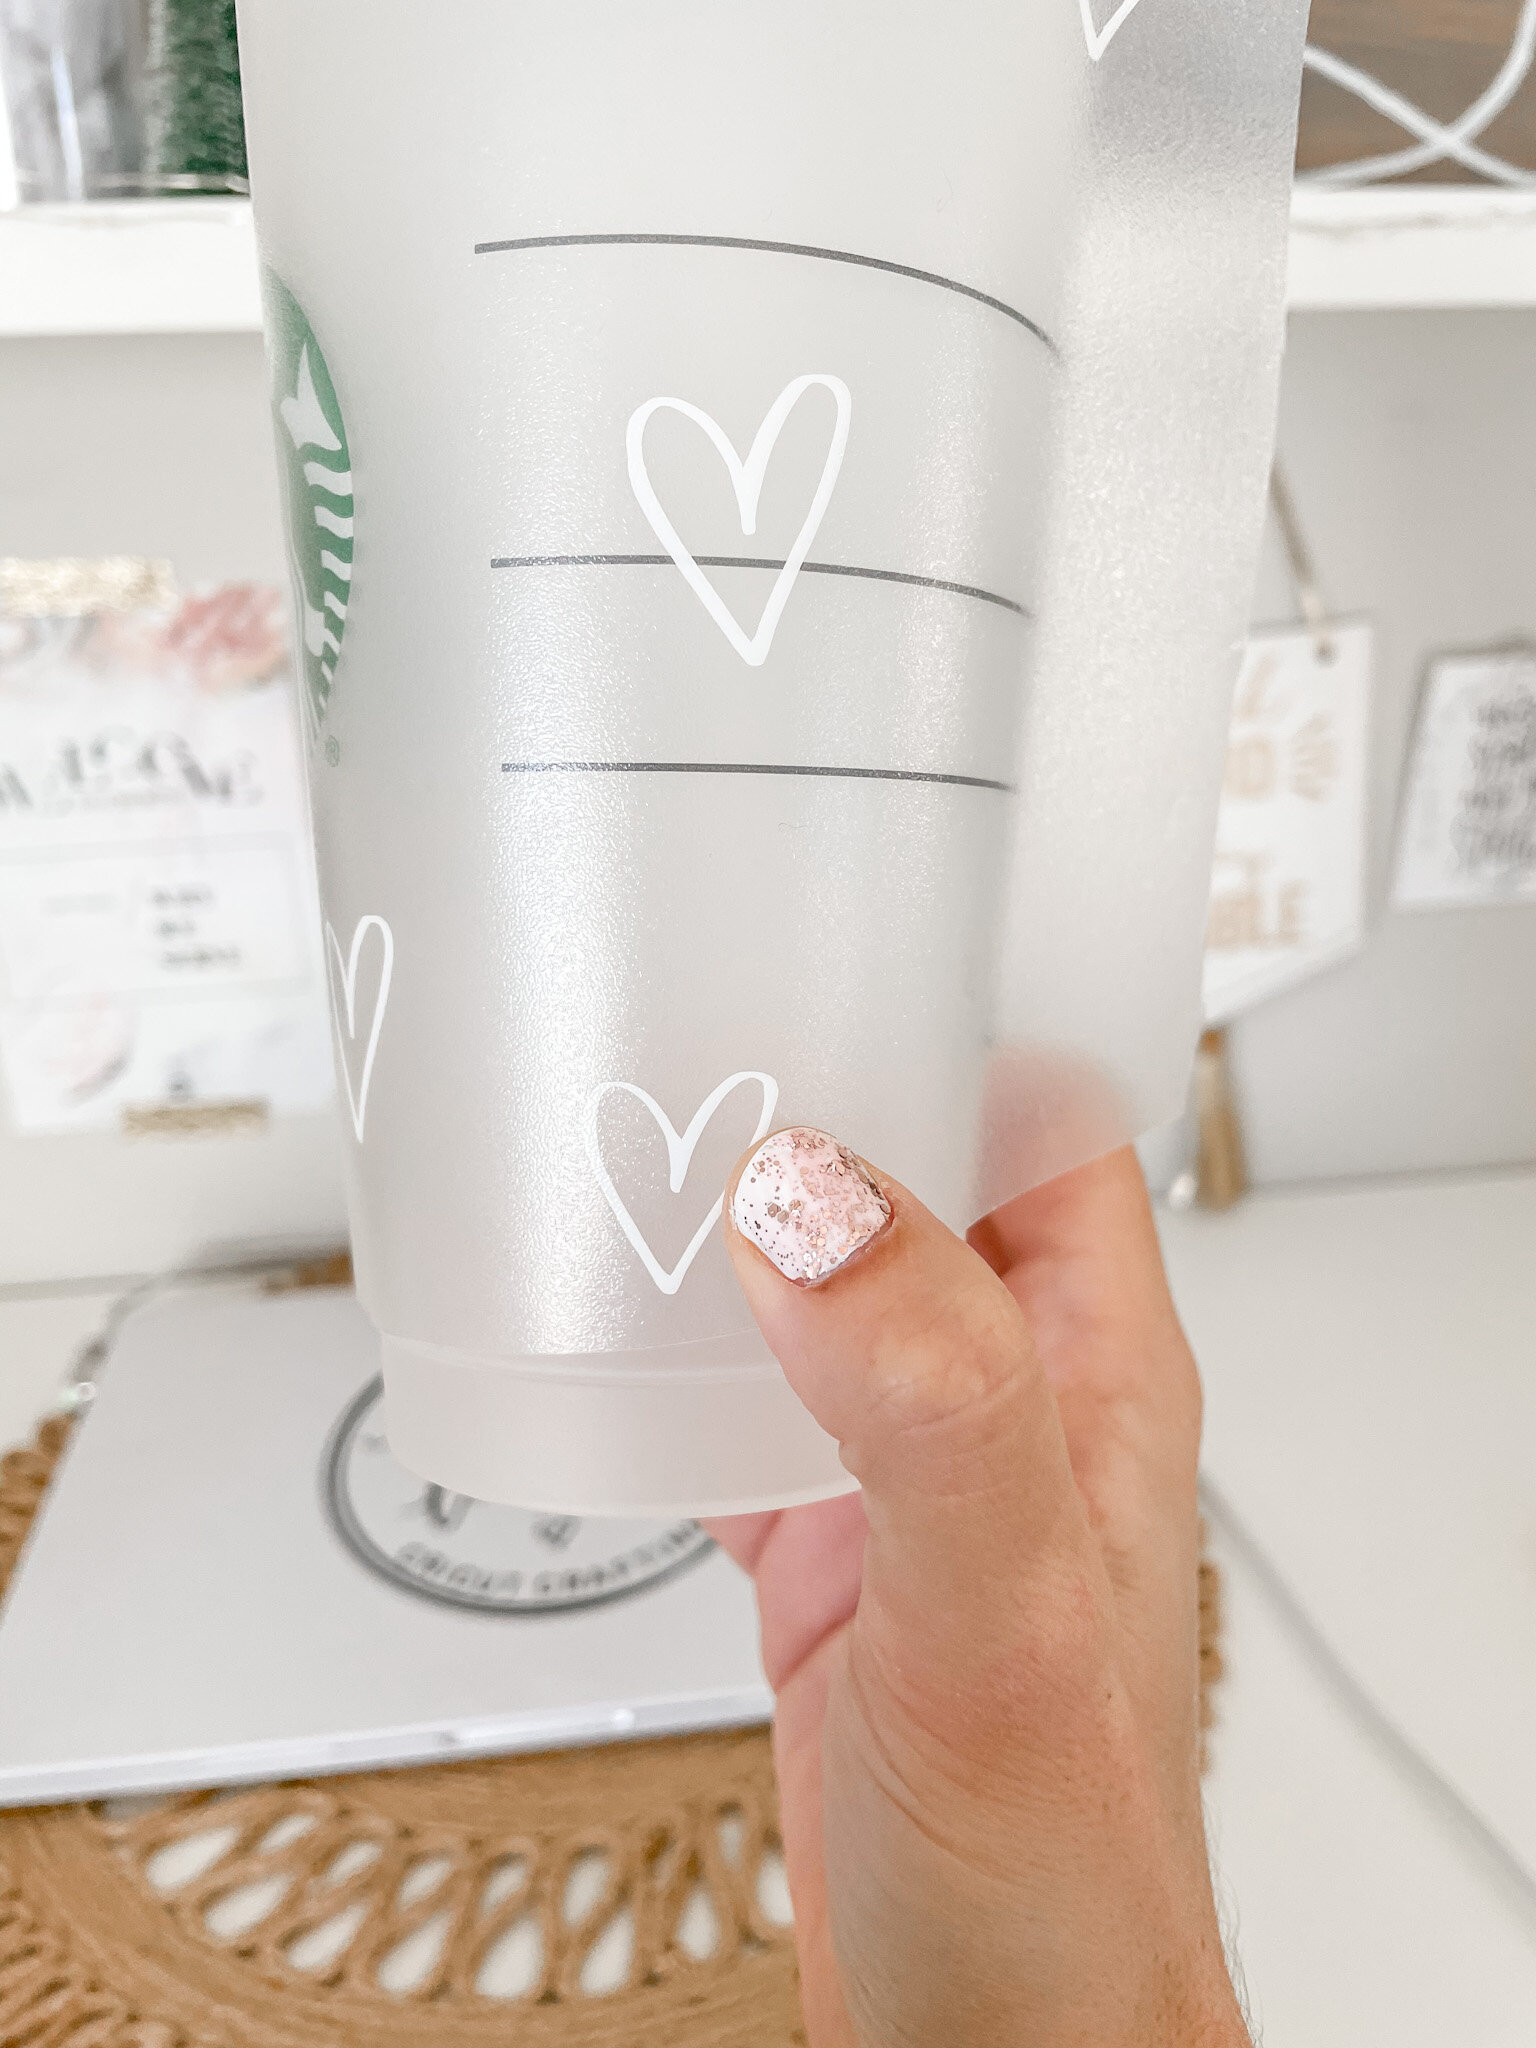
Next, apply the hearts one layer at a time it on your cup. I recommend starting with the white layer (since it has the most hearts). Next do the red layer (rose gold foil for me actually!), and finally the pink layer since it only has two hearts.
Carefully remove the transfer tape each time you apply a layer. You might have to run the scraper tool a bit over the heart to make sure it sticks to the cup well.
Once you’ve applied all your hearts, you’re done! Hooray!

If you try this DIY I’d love for you to share a picture over social media using the hashtag #brittanylettering! For even more ideas, follow @brittanylettering, @officialcricut, and @expressionsvinyl over on Instagram!
Be sure to head over to the Etsy shop to find even more fun designs for your holiday projects!
Happy lettering & happy crafting!
XO Brittany